


Most businesses know they should write their processes down. Few do, because writing an SOP by hand means pausing the work, taking a dozen screenshots, cropping them and then describing every click. Wikidoc removes that friction: you do the task once while recording, and AI turns it into a finished SOP.
The people who know a process best are usually the busiest people in the business. Asking them to stop and document what they do feels like a tax on their time, so the knowledge stays in their heads. When they’re away, on leave or gone for good, the team has to work it out again. That’s how key-person dependency builds up.
The problem isn’t a lack of willingness. It’s that traditional documentation takes far longer than the task itself: a five-minute task can take an hour to document properly. AI changes that, because capturing the process takes as long as doing it.
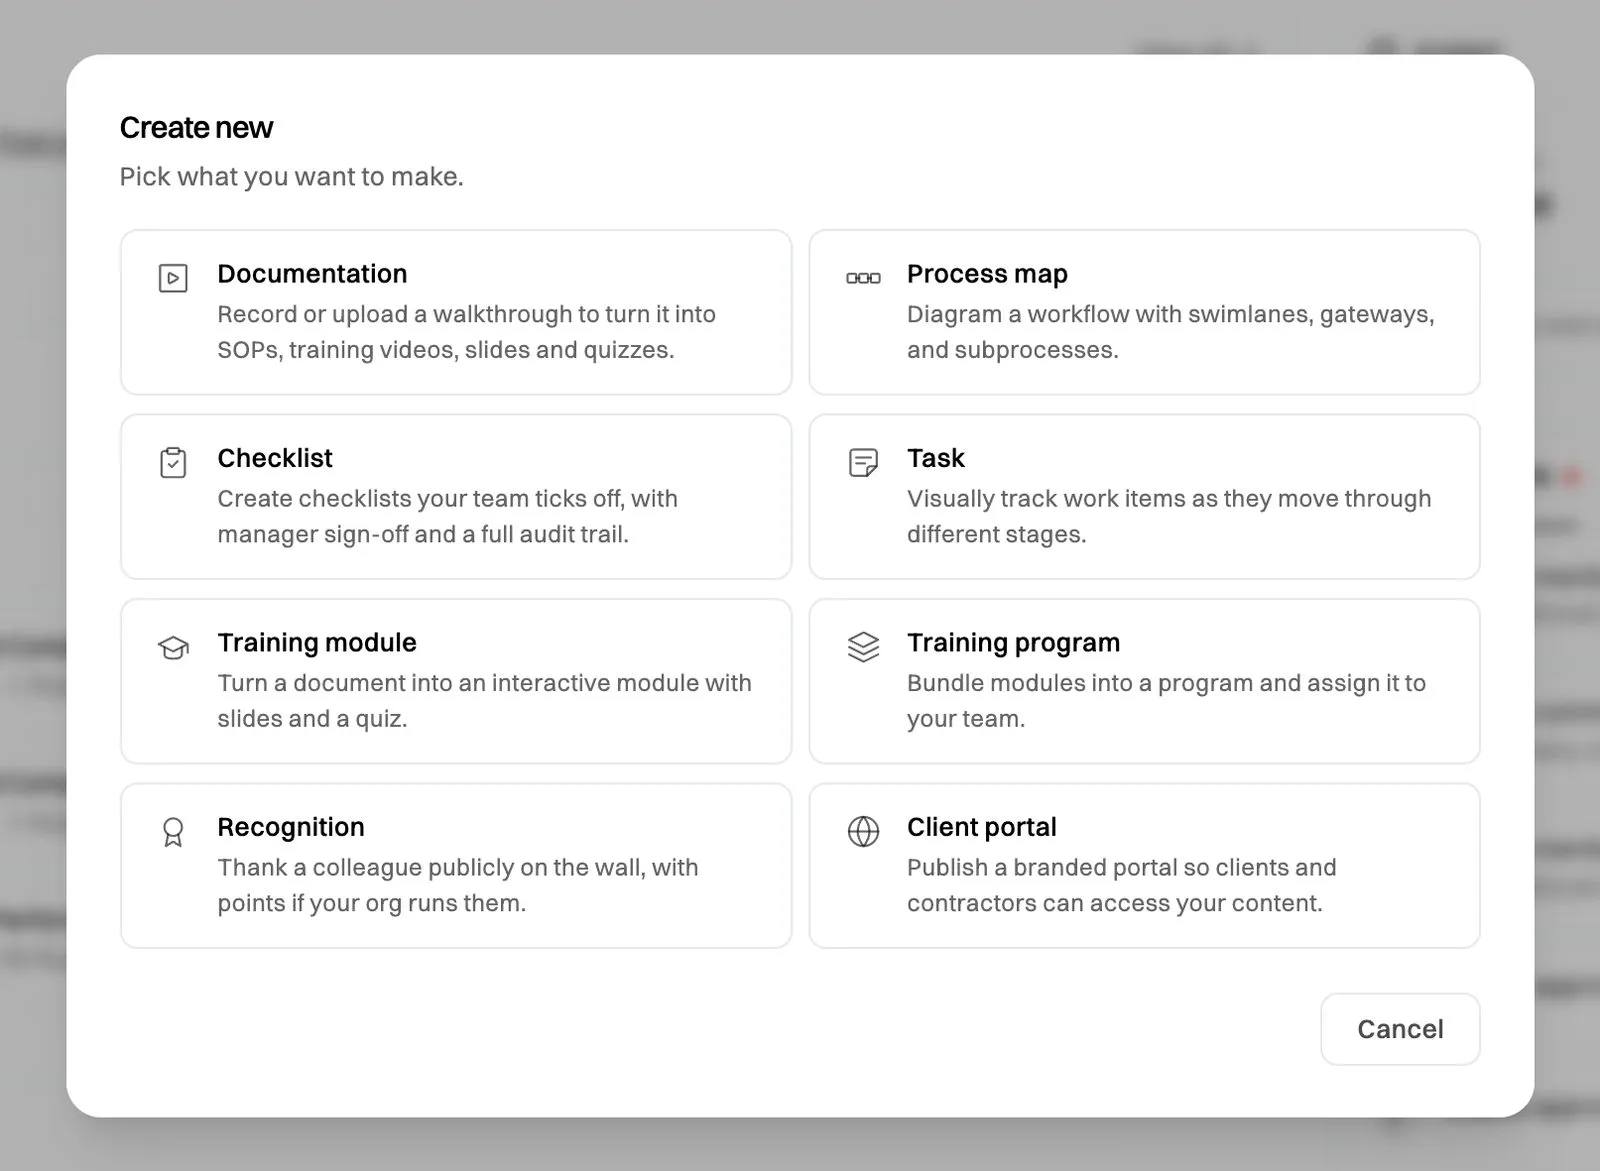
From your Wikidoc Home screen, click + Create new and pick Documentation. It’s the option for turning a walkthrough into SOPs, training videos, slides and quizzes.
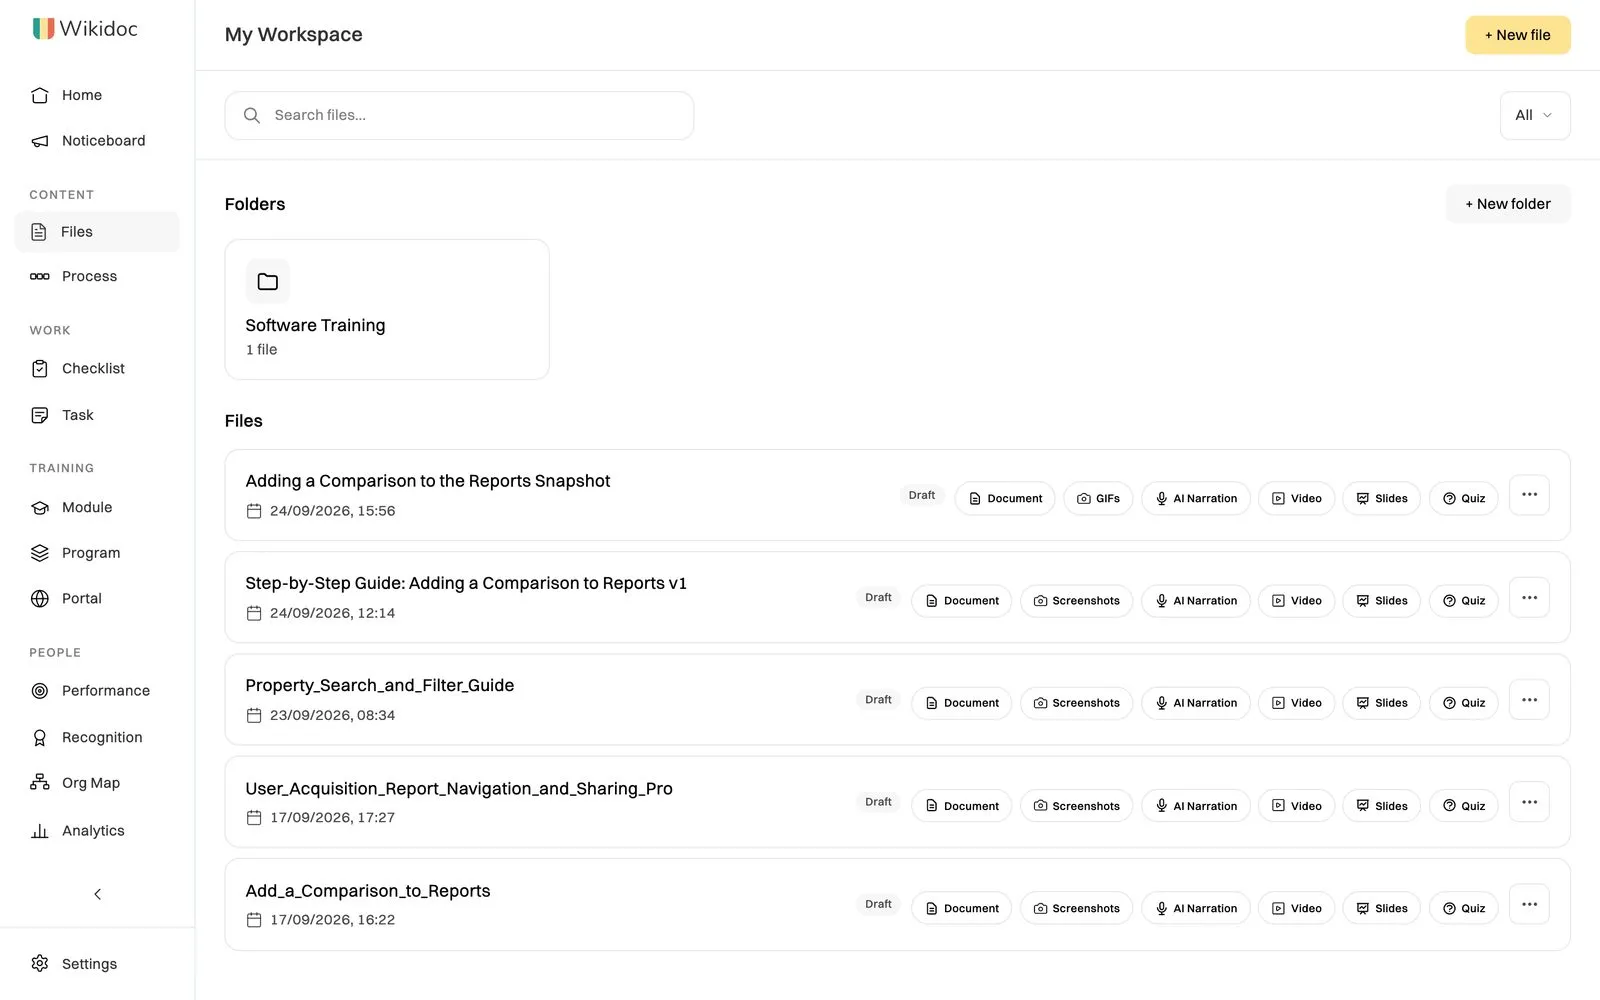
This takes you to My Workspace, where all your documents live.
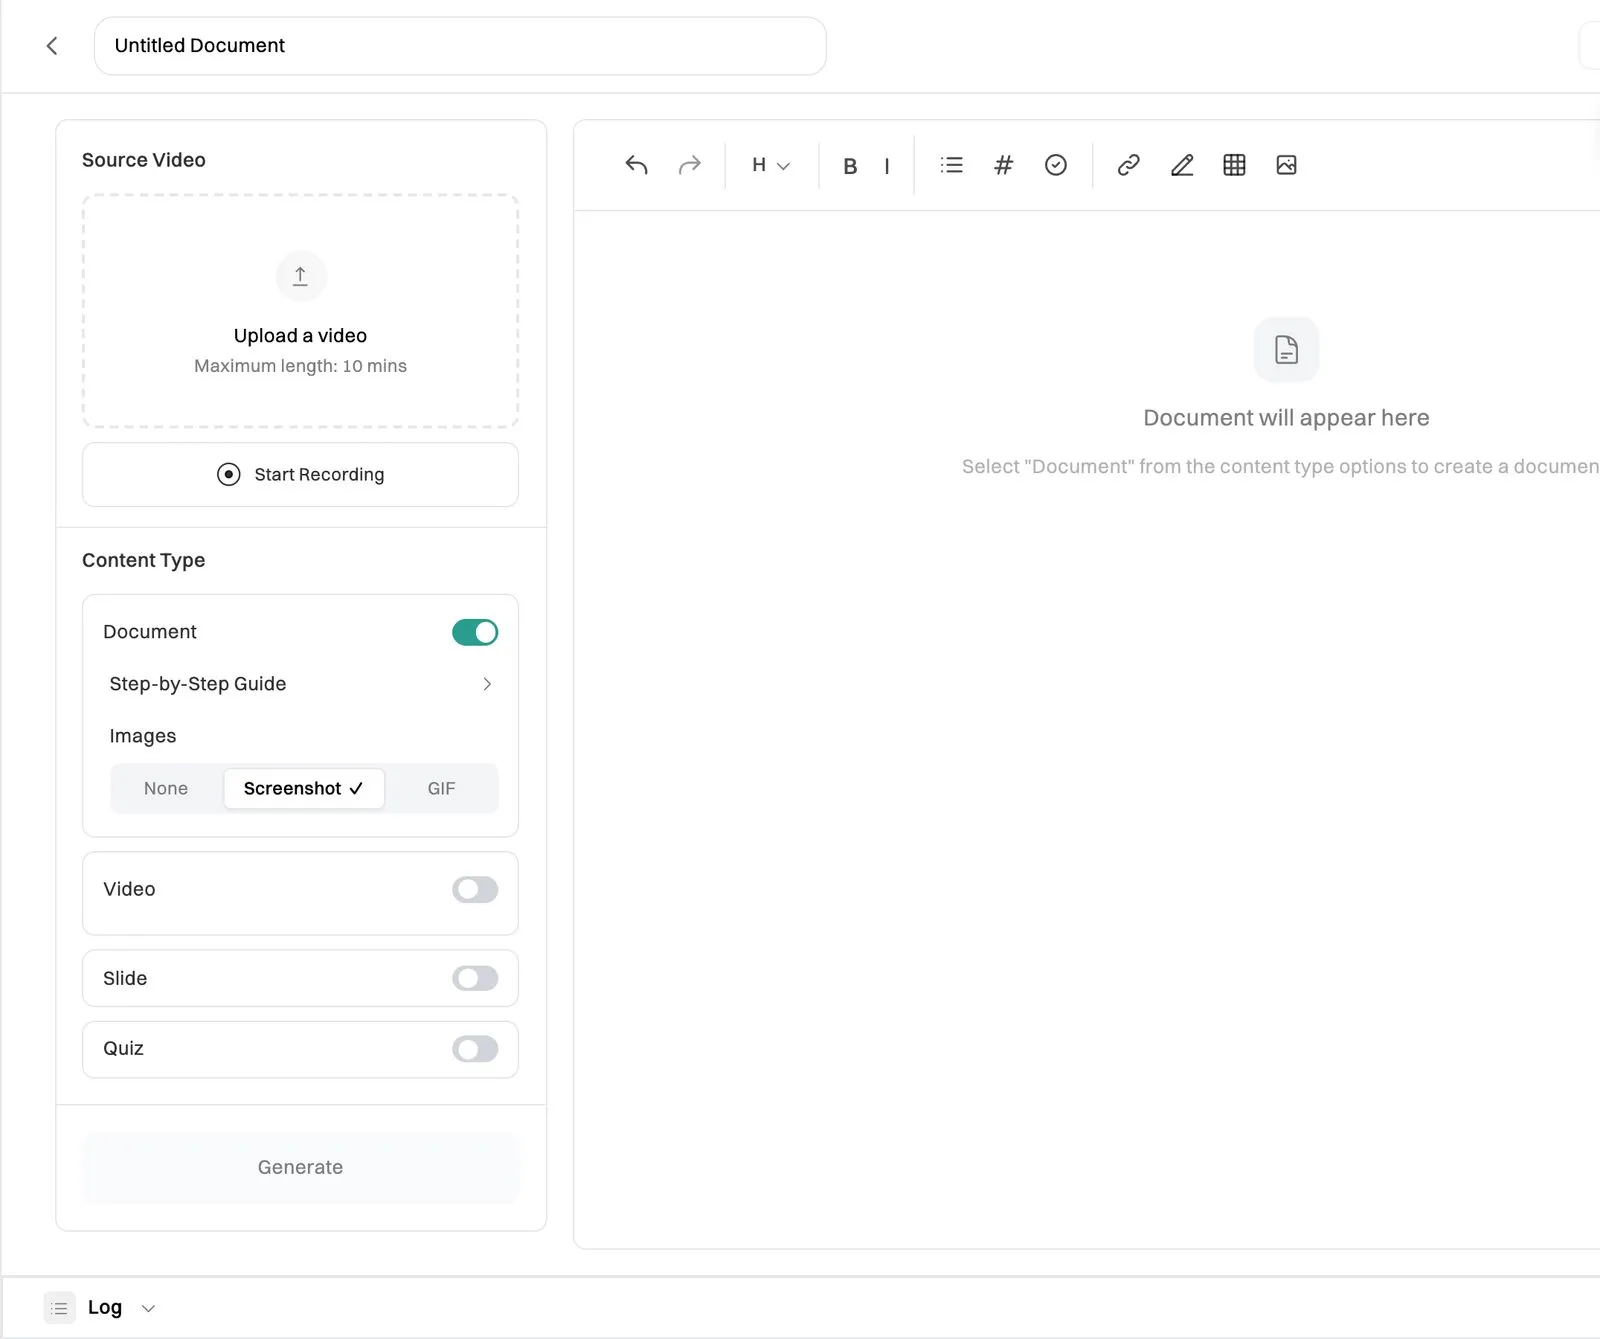
Click + New file. On the left, under Source Video, either click Start Recording and do the task as you normally would, or upload a video you already have (up to 10 minutes, or 5 minutes on the Free plan). Talk through what you’re doing if it helps: Wikidoc uses your narration as well as what happens on screen.
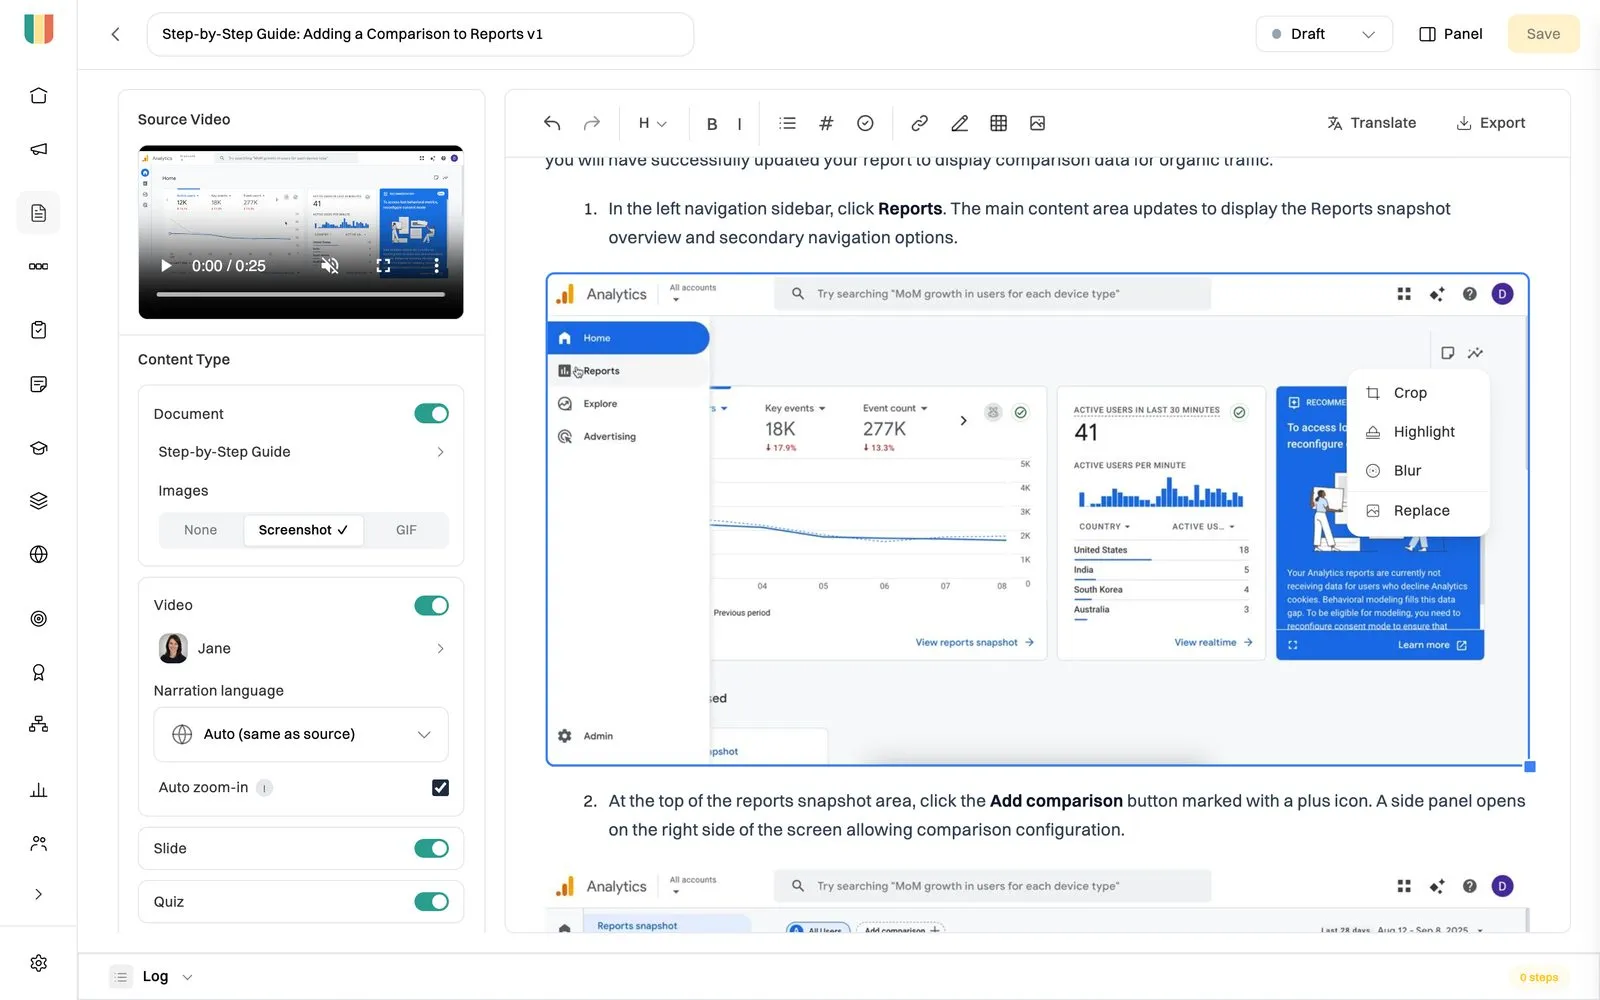
Under Content Type, choose what to make. Document is on by default, as a step-by-step guide with a screenshot for each step. On Pro and Team you can choose GIFs instead, and tick Auto-highlight clicks to circle what was clicked in each screenshot. You can also switch on Video, Slide and Quiz. Then click Generate.
Tip: keep each recording to one outcome, such as “Issue a customer refund” rather than “Everything in the billing system”. Shorter SOPs are easier to follow and easier to keep up to date.
Have a screen recording of the task? The free AI SOP generator turns a recording of up to 2 minutes into a step-by-step SOP with a screenshot for every step. No sign-up needed.
Wikidoc analyses the video and what you said, then drafts a step-by-step document. Each step has a clear instruction, with the button or field to click in bold, and a screenshot captured at the right moment. There’s no cropping or copying and pasting by hand.
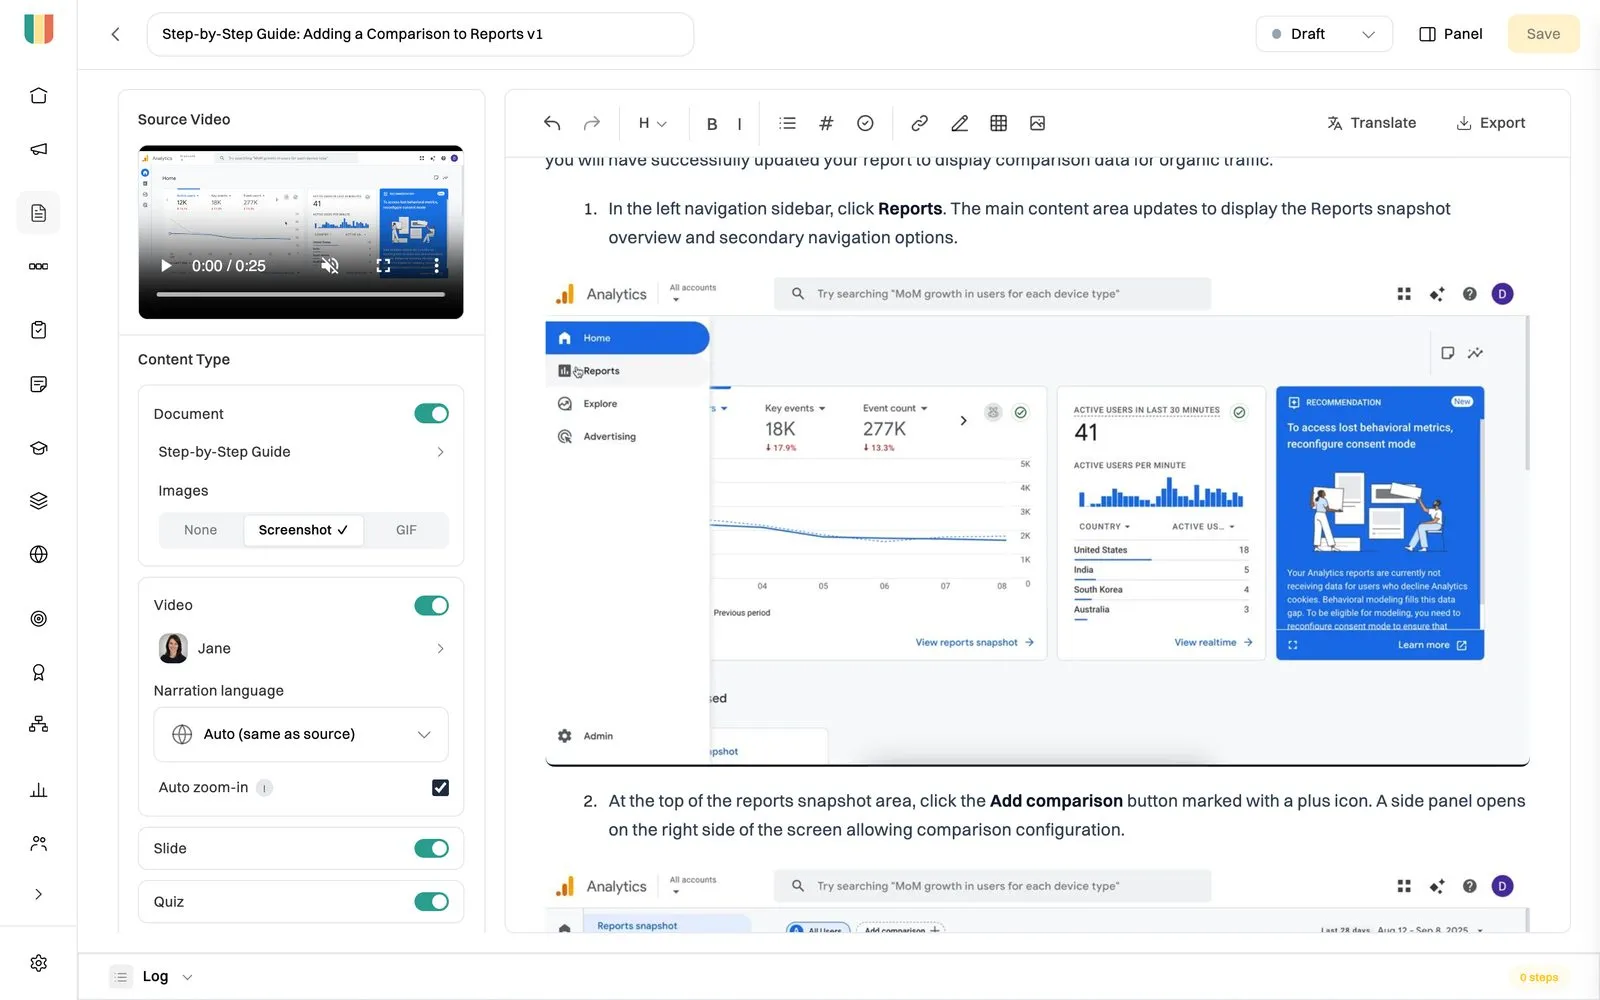
Every step is editable, like a normal document. Use the toolbar to change headings, lists, links and tables. Click any screenshot to Crop it, Highlight the part that matters, Blur customer names, emails and account numbers, or Replace the image.
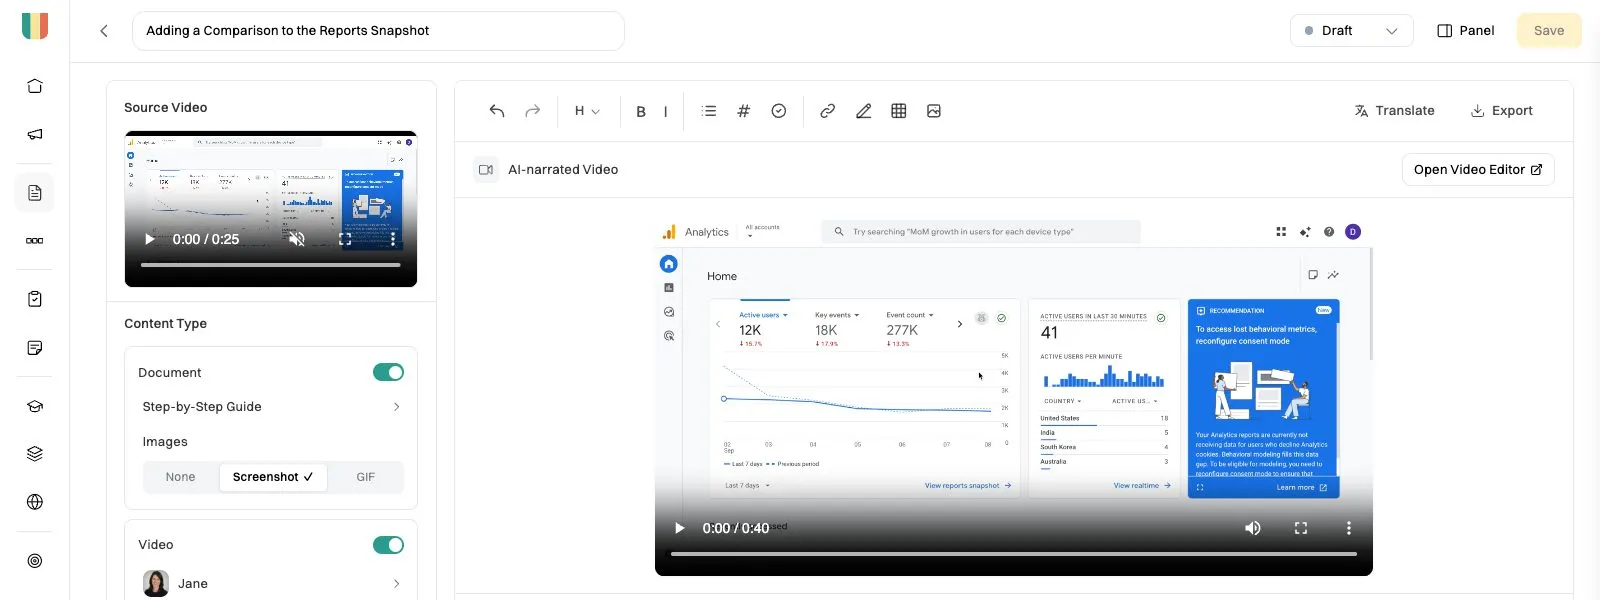
If you switched on Video, the narrated video appears above the written steps. Click Open Video Editor to polish it. The timeline has separate Video, Narration and Zoom tracks, so you can change one without touching the others. Use Cut to remove pauses and mistakes.
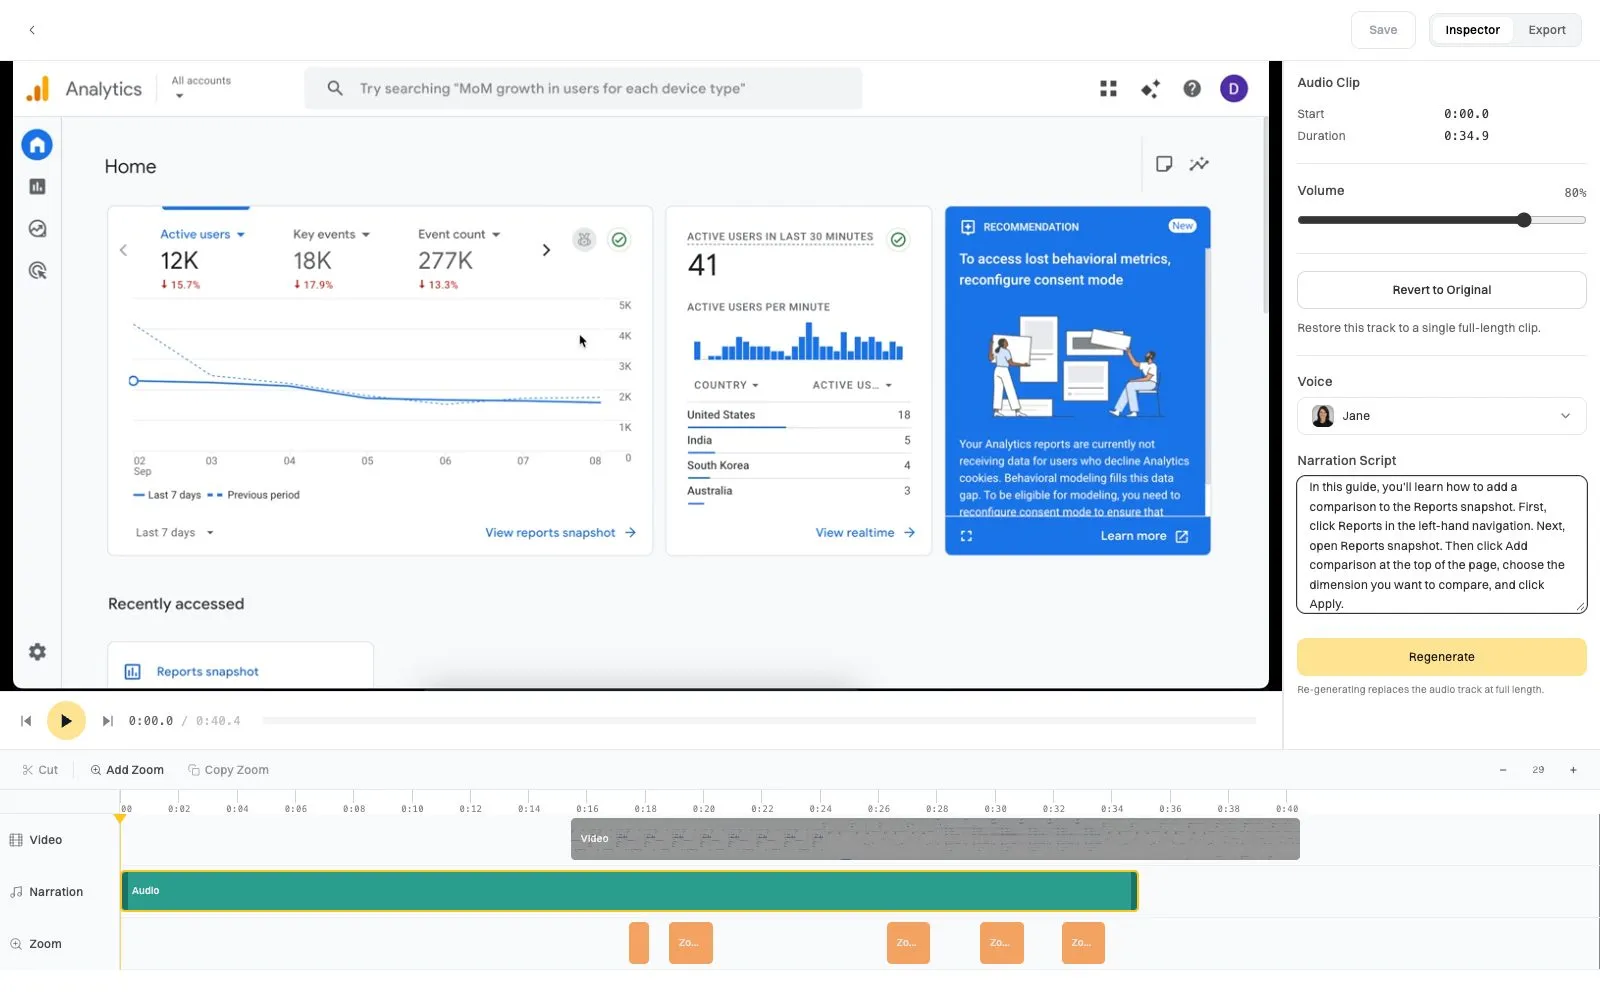
Click the narration clip to change the voiceover. Pick a different voice, rewrite the narration script, then click Regenerate. When the process changes, you update the words instead of recording again.
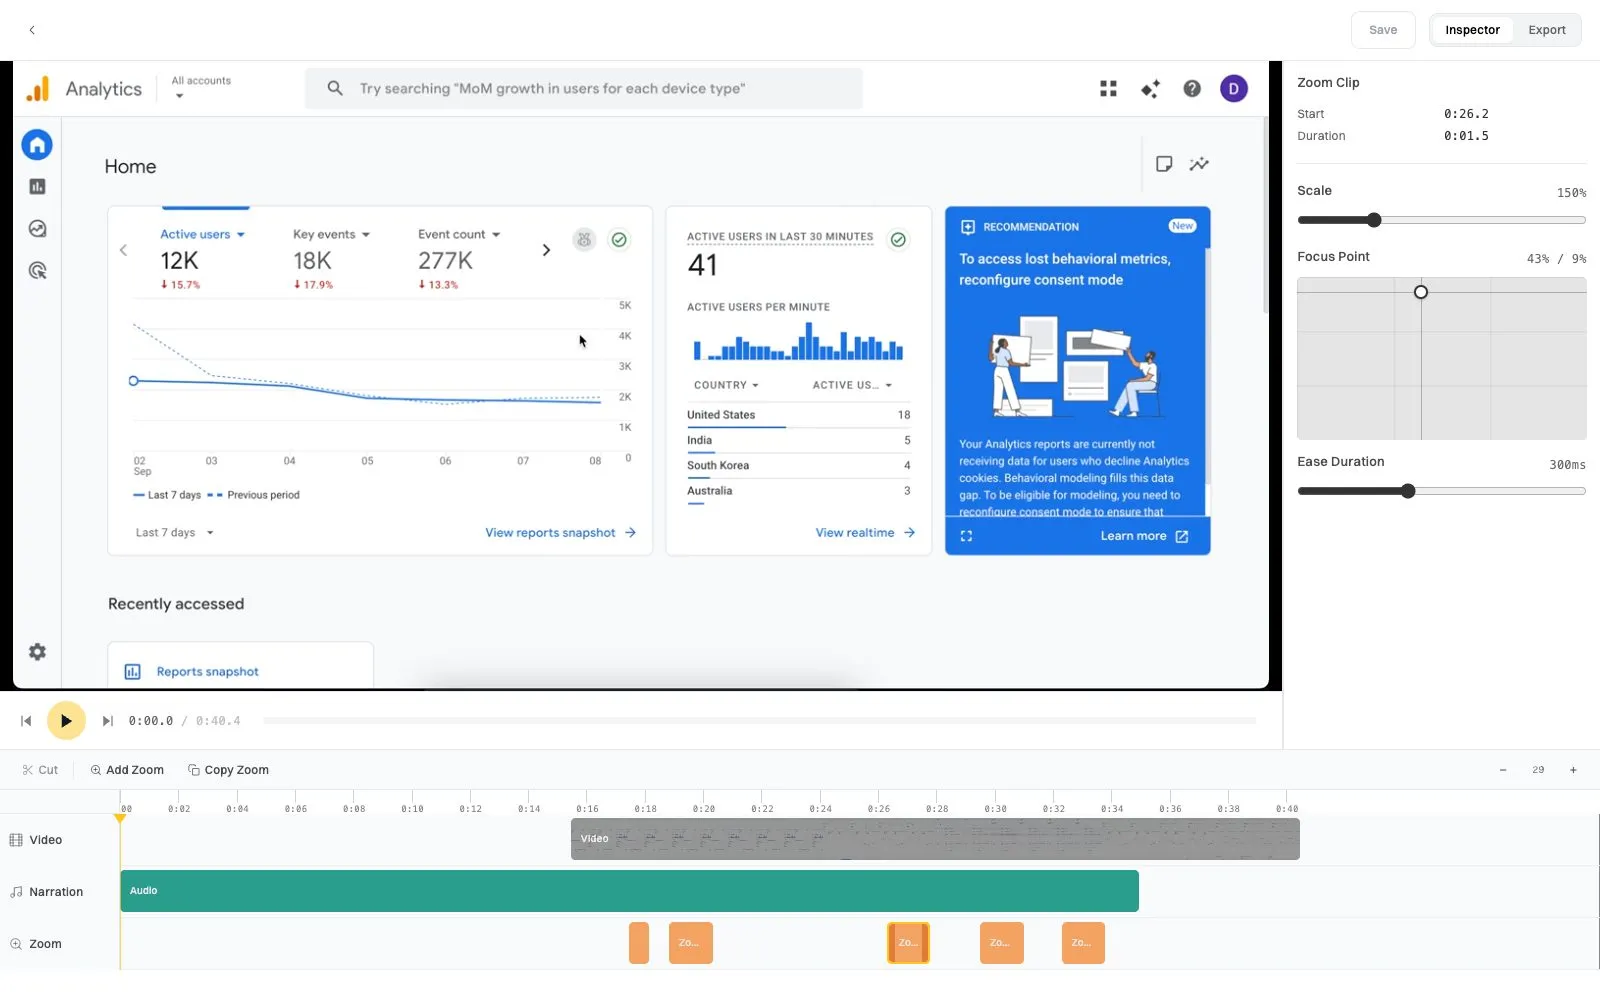
The blocks on the Zoom track are zoom-ins Wikidoc added where you clicked. Select one to set its scale, drag the focus point to the part of the screen that matters, and adjust how smoothly it eases in. When you’re done, click Save, or open Export to download an MP4 or MOV.
For more on the video, including adding it to a training module, see Create and edit an AI-narrated video in the Help Centre.
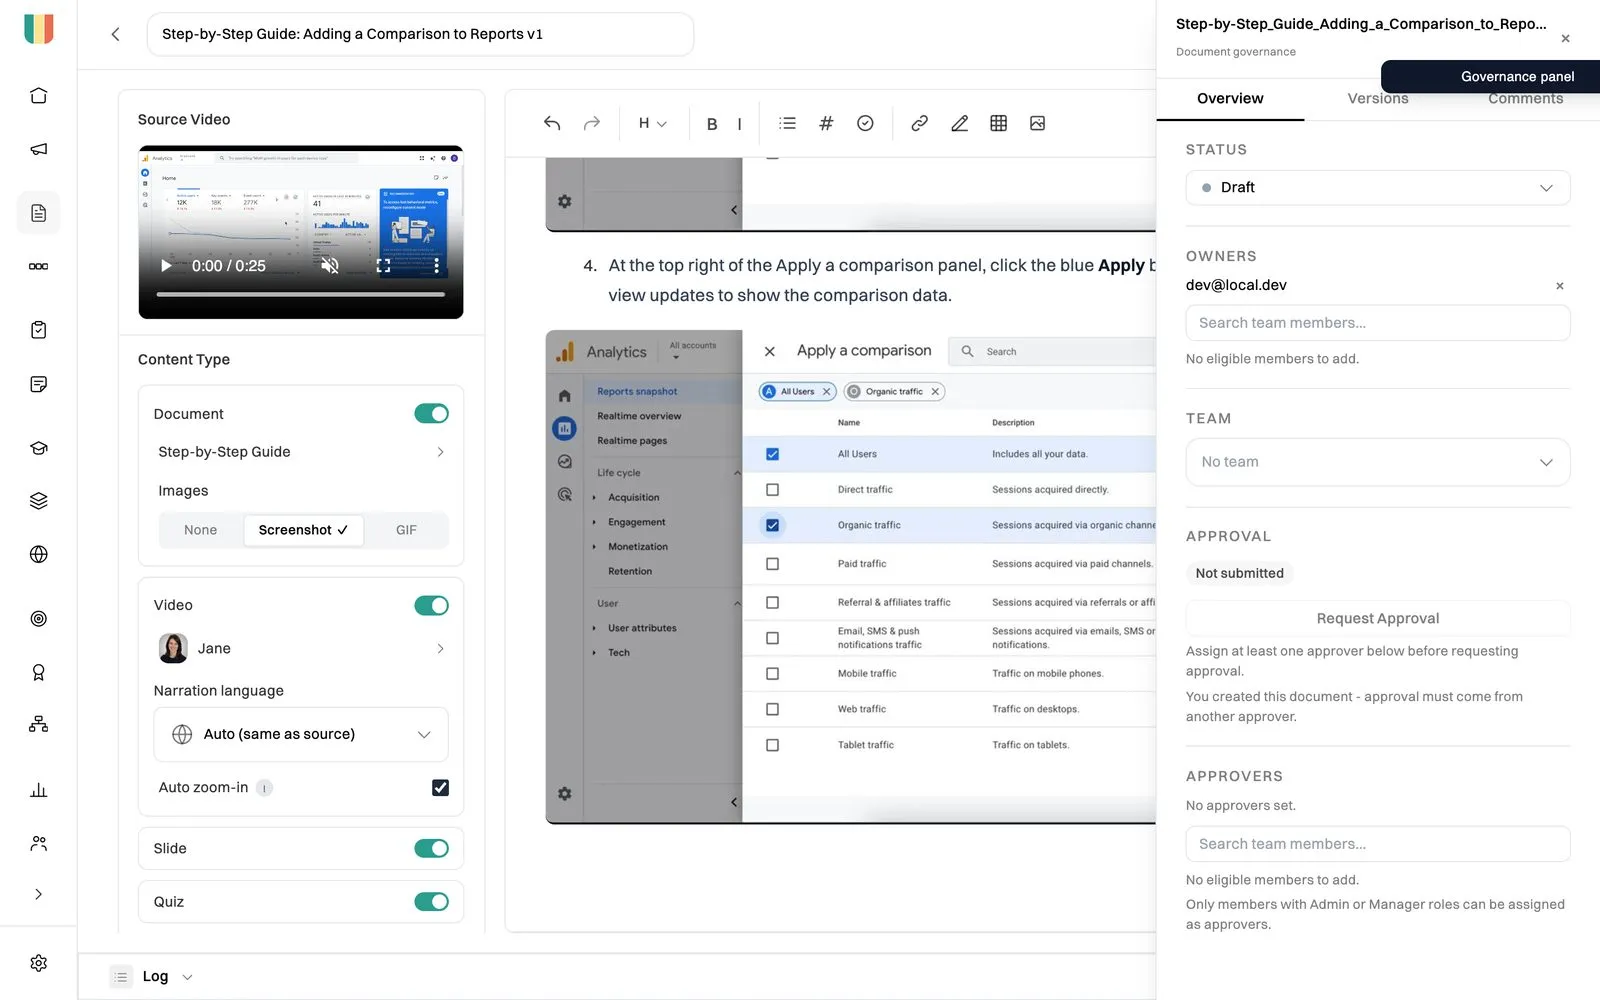
Click Panel to open the document’s governance settings. Set the status, add owners and a team, and name the approvers, then click Request Approval. You can’t approve a document you created yourself; someone else has to sign it off. The Versions and Comments tabs keep the full history and the discussion in one place. Approvals and comments are on the Team plan.
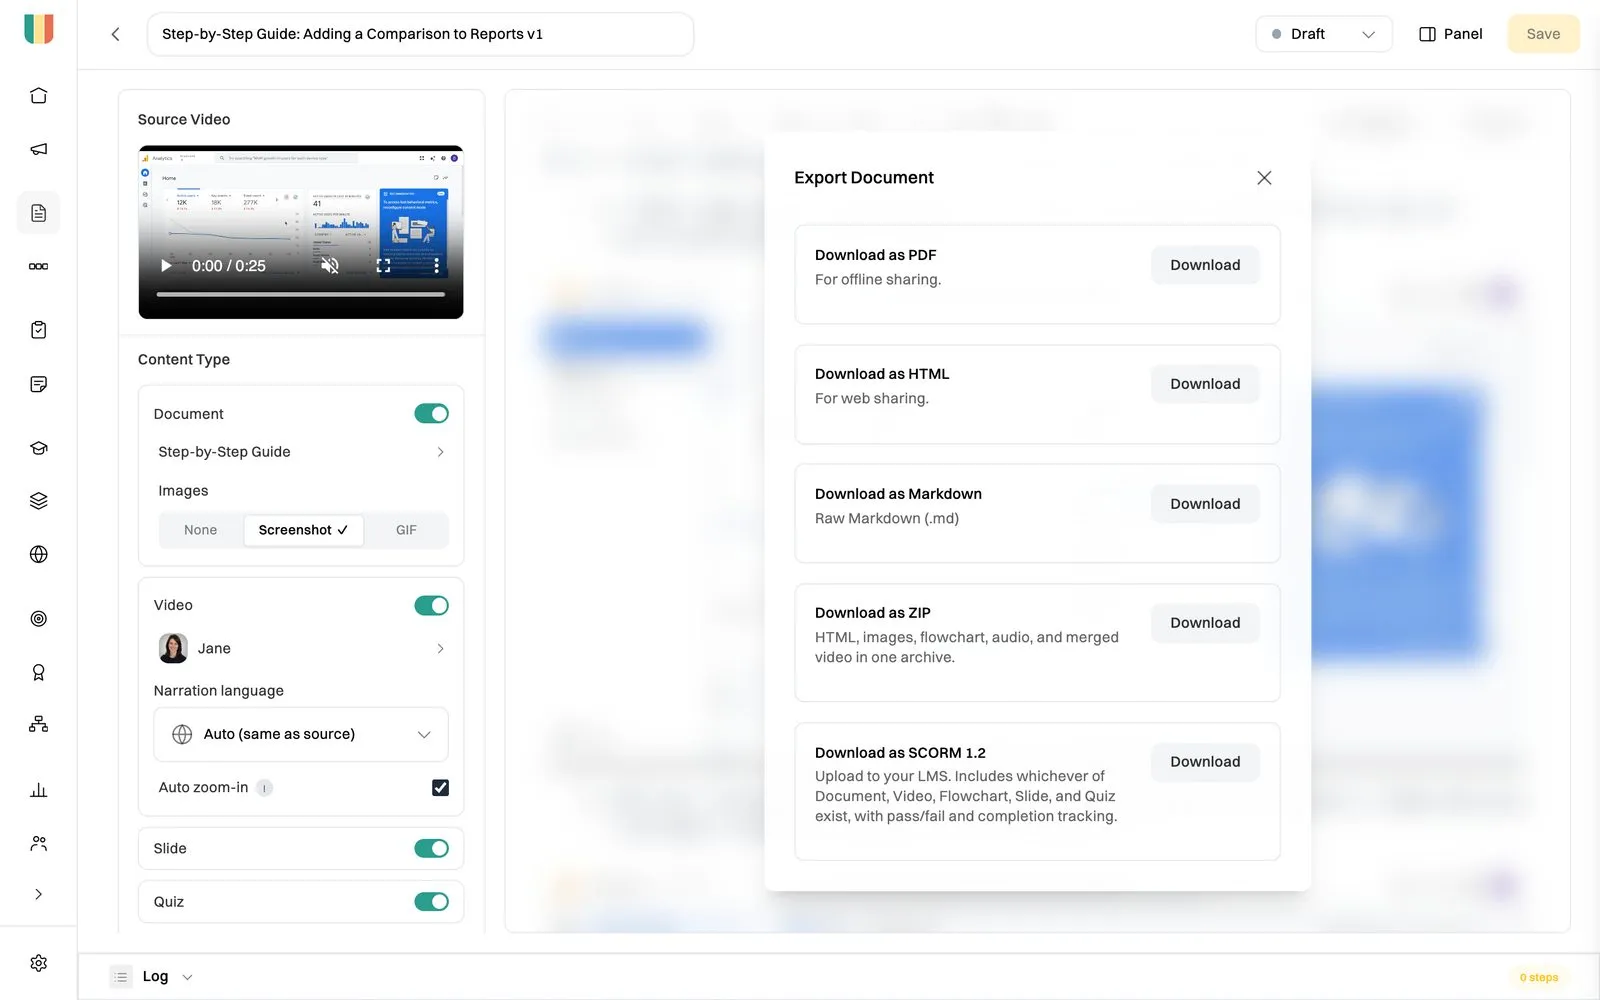
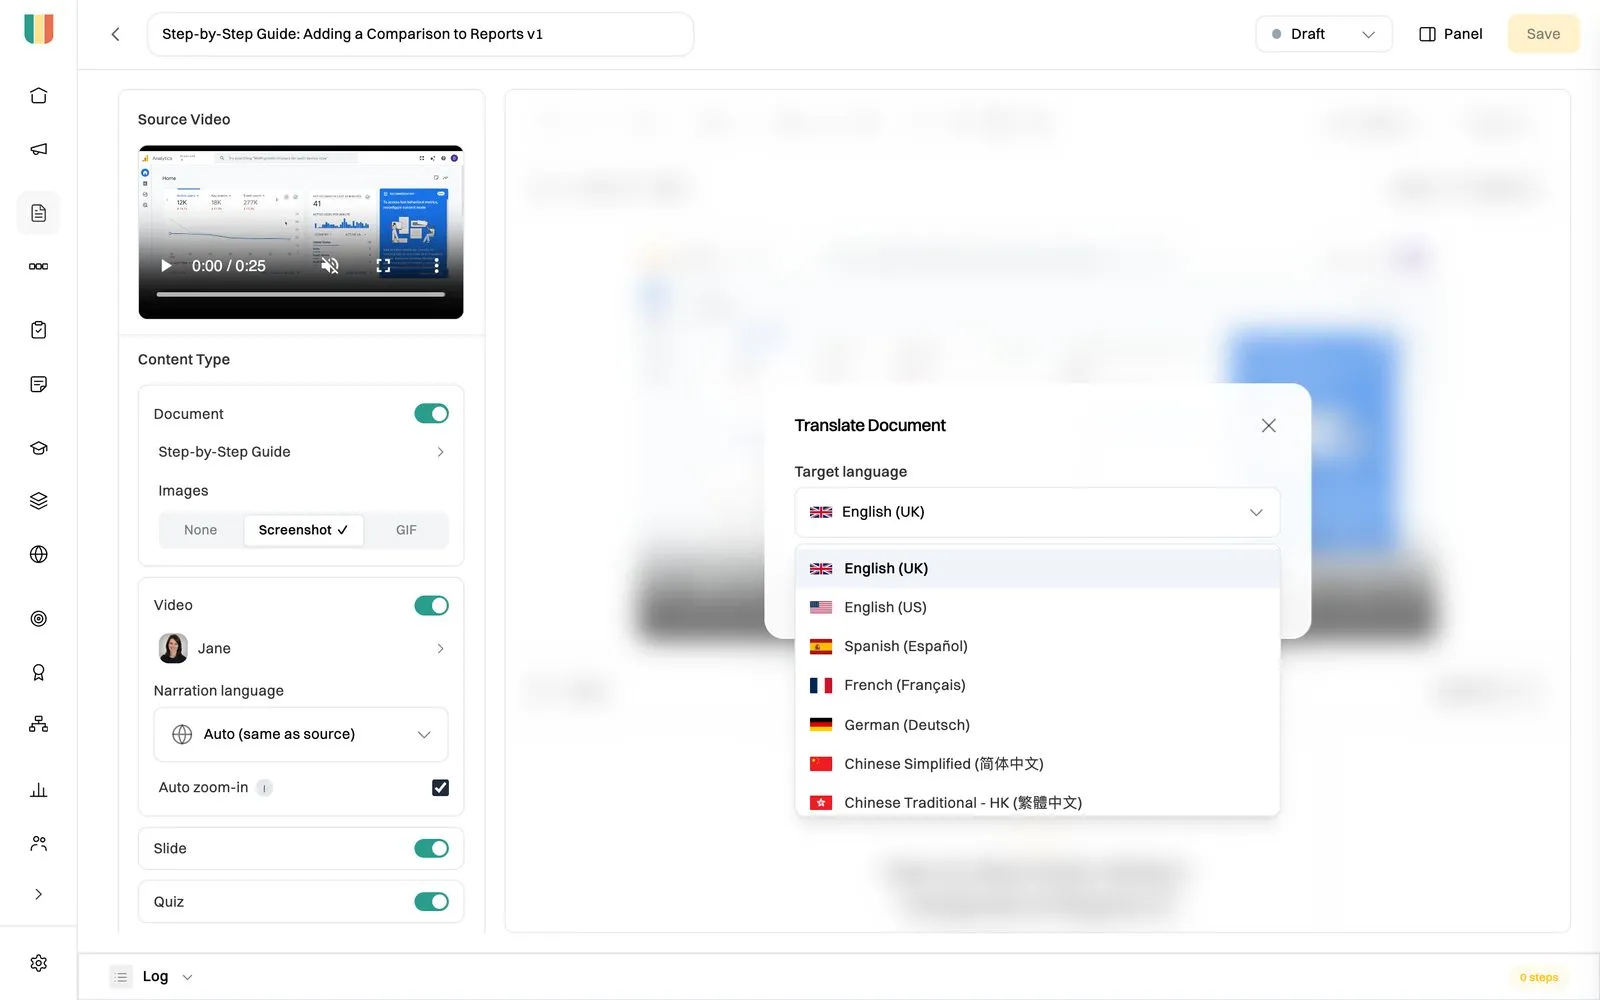
Click Export to download the SOP as a PDF, HTML or Markdown, or on Pro and Team as a ZIP of everything or a SCORM 1.2 package for your LMS. Click Translate to make a copy in another language for a multilingual team.
If you’d rather start from a blank outline, our free SOP template has the sections every SOP needs, and The Ultimate Guide to SOPs covers what goes in each one.
A standard operating procedure (SOP) is a step-by-step document explaining how to carry out a routine task consistently, whoever is doing it. It usually covers the responsible role, the tools needed, the ordered steps and what “done” looks like.
About as long as the task itself. You record the task once and Wikidoc drafts the SOP in a minute or two. Most of your time goes on a quick review.
Yes. Film the task on a phone, talking through each step, and upload the video. Wikidoc drafts the steps from what it sees and what you say, and you can replace any frame with a clearer photo. To map a process from a written description instead, use the AI flowchart generator.
Use the blur tool in the screenshot editor to cover anything confidential, such as customer names or account numbers. Wikidoc also removes passwords, API keys and access tokens from the text it writes. Where you can, record with test data.
Yes. The free AI SOP generator turns a short screen recording into a step-by-step SOP with a screenshot for each step, with no account. Save the result to Wikidoc when you want to edit it, add a video or share it.


