
Generate slides and quizzes
Make a slide deck and a quiz from the same recording as a document, then edit, present and export them.
From the same sources as a document, Wikidoc can make a slide deck to train people with, and a quiz to check they’ve understood. Both follow the same outline as the document.
Choose slides and a quiz
Section titled “Choose slides and a quiz”When you create a document, tick Slides and Quiz on the Create tab before you click Generate.
- The slide deck is planned like a lesson: a cover, the learning objectives, a section for each part of the outline, and a summary. Each slide gets the layout that suits what it says, such as numbered steps for a process, icon cards, a comparison, a table or a callout for a warning, with speaker notes and the pictures from your files where they help. A few knowledge-check questions sit between the sections. From a screen recording, it has a slide for each step with its screenshot, and where Wikidoc could see what was clicked or hovered over, an arrow on the screenshot points to it.
- The quiz has multiple-choice questions covering every learning objective. The passing score starts at 80%.
Under Slides you can choose:
- The kind of deck: Training session (the default), Briefing for a shorter update, or Quick reference for a deck people look things up in. A screen recording always makes a step-by-step deck, so it doesn’t offer this.
- The length: Shorter, Standard length or Longer.
- Template: the look of the deck. It starts as your organisation’s default, or Training Session if your organisation hasn’t set one, and you can change it later.
Wikidoc remembers your choices for the next deck. To add slides or a quiz to a document later, open it, go to the Create tab and click + Create beside Slides or Quiz. They’re written from the same outline. From a screen recording, they’re made from the saved document; if there isn’t one, Wikidoc analyses the recording again first. See Review what was made.
On the Free plan you can make three slide decks and three quizzes. Pro and Team have no limit.
View and present the slides
Section titled “View and present the slides”Open the document, click the Slides tab, then click Edit. Click a thumbnail at the bottom to go to that slide.
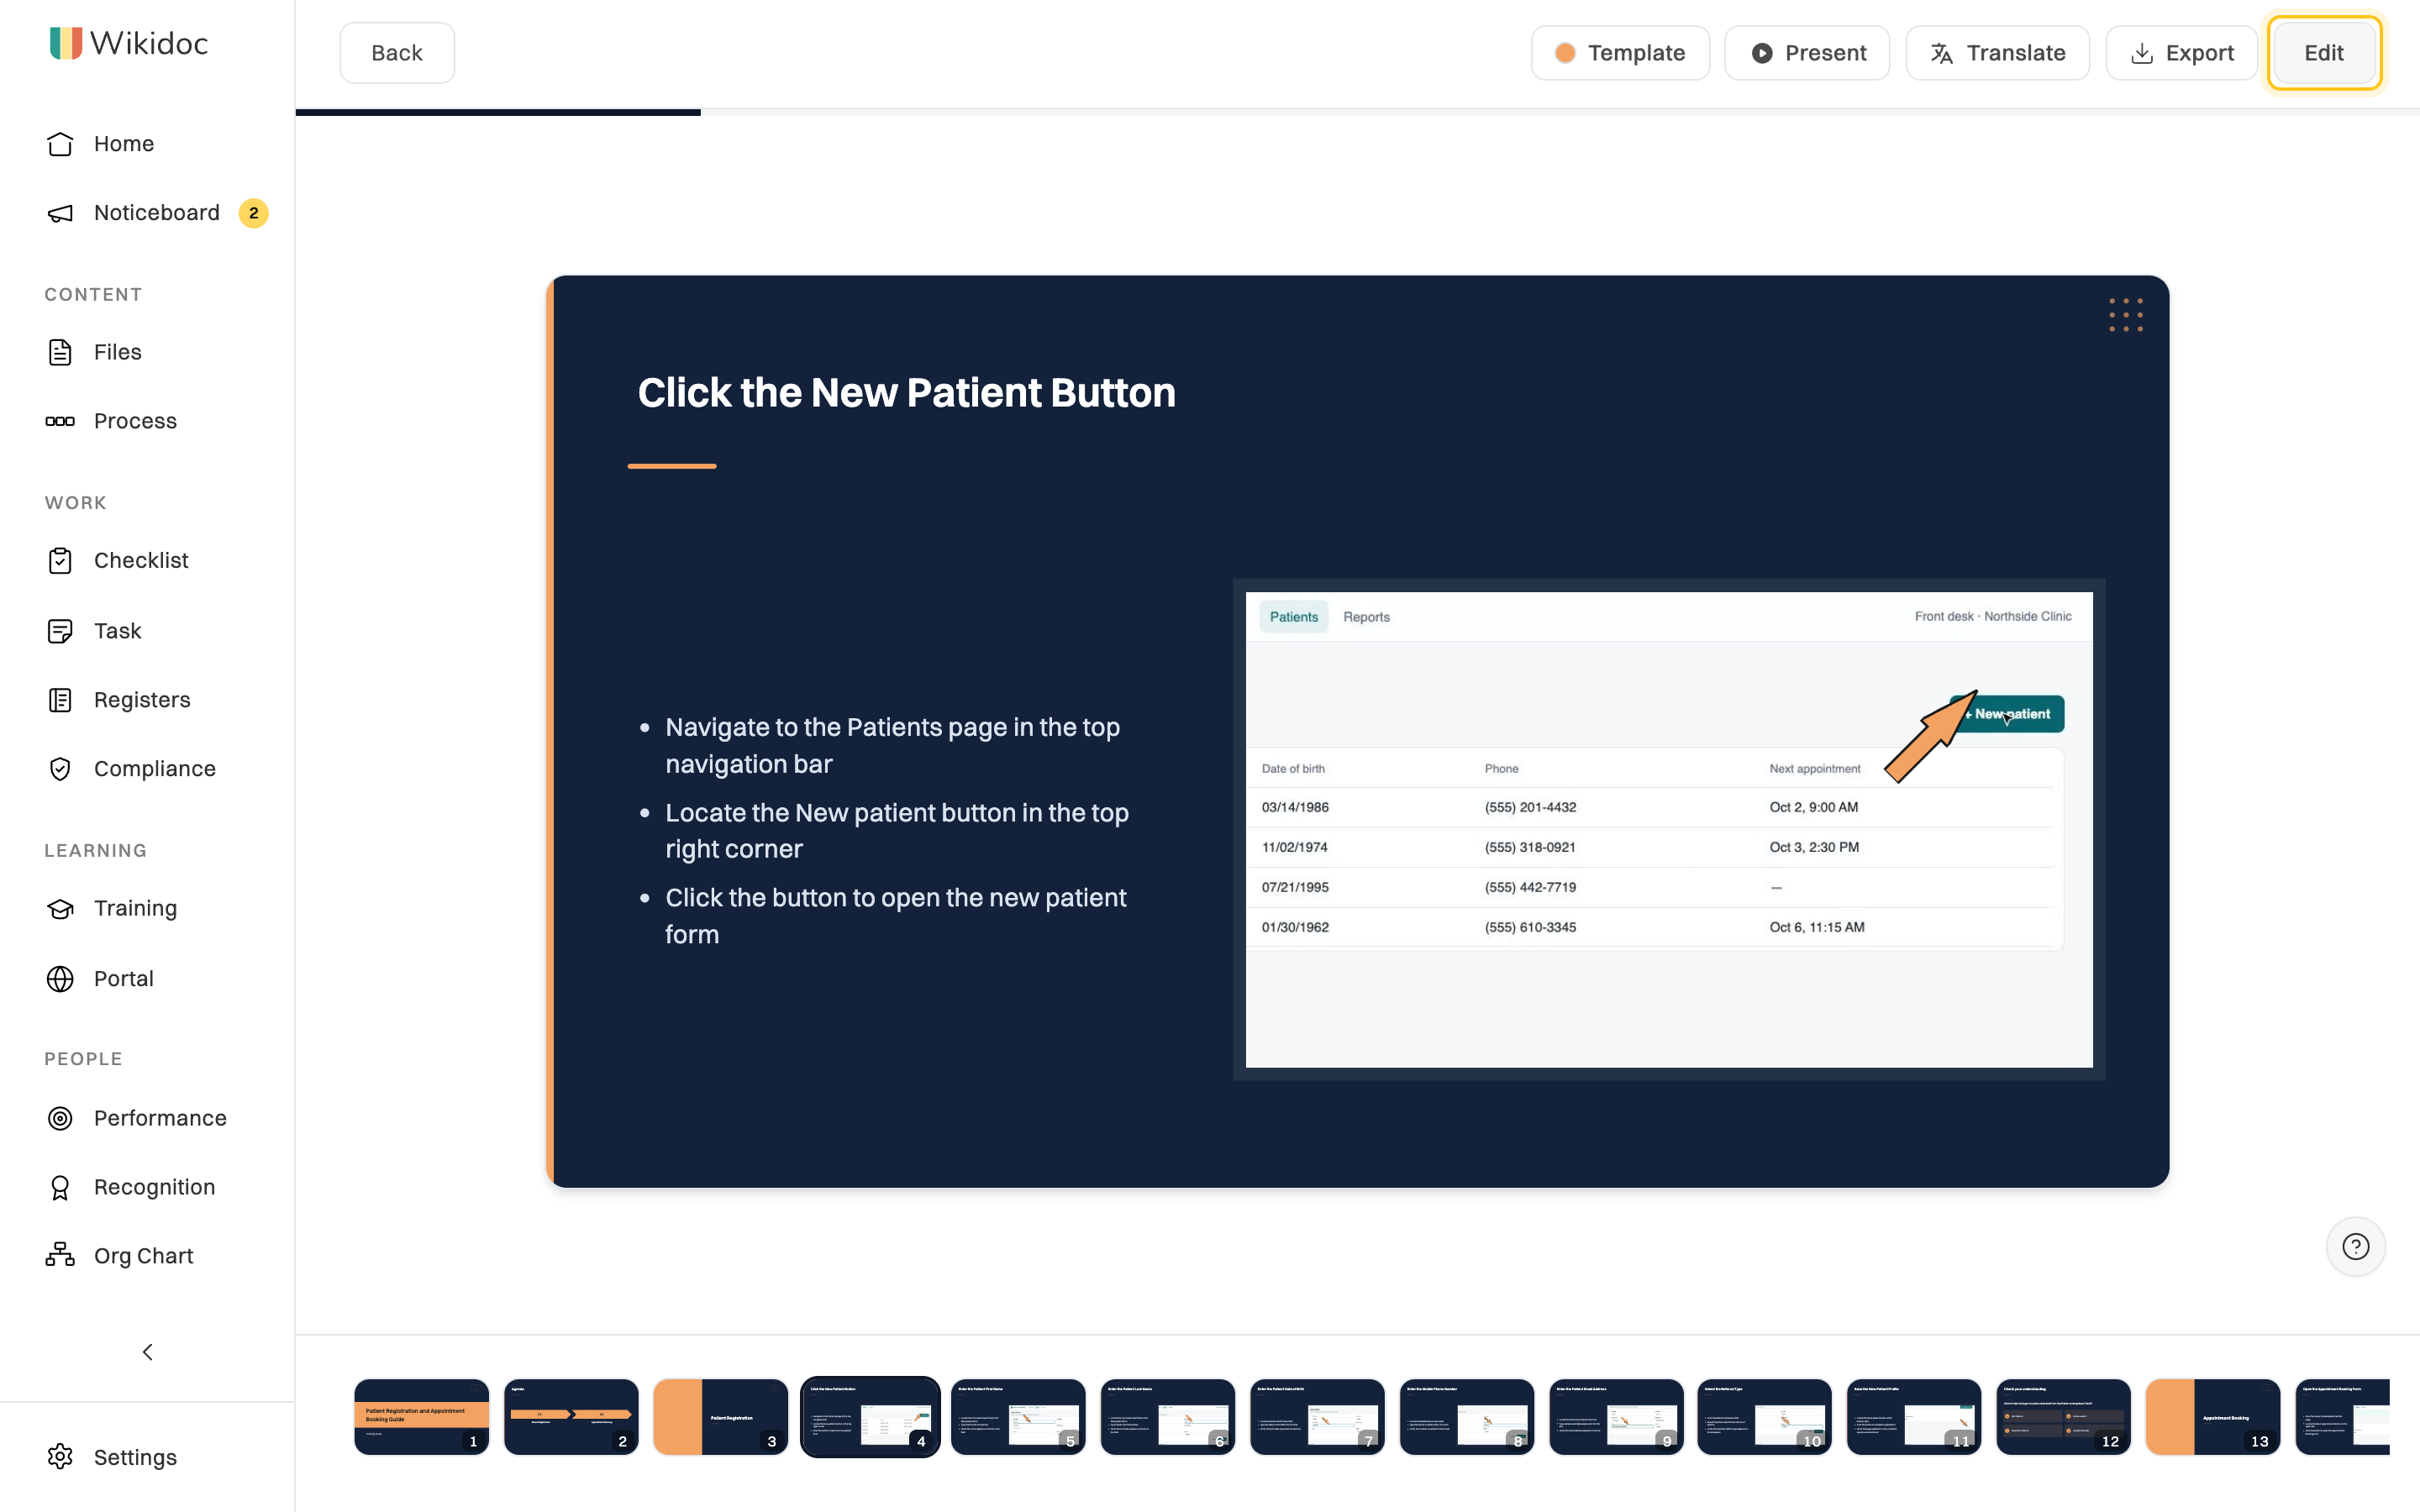
- Present shows the deck full screen. Press N to see your speaker notes, and Esc to stop. On a knowledge-check slide, click an answer to see whether it’s right, with the explanation; Try again clears it.
- Template changes the look of every slide, and the slide size: Widescreen (16:9), Standard (4:3) or A4 landscape for printing.
Change the template
Section titled “Change the template”Click Template, then Change template…. There are six templates: Training Session, Corporate Clean, Bold Geometric, Compliance / QMS, Dark Tech and Minimal. Each has its own colours, fonts and decoration. A deck made before templates keeps its original theme until you choose one.
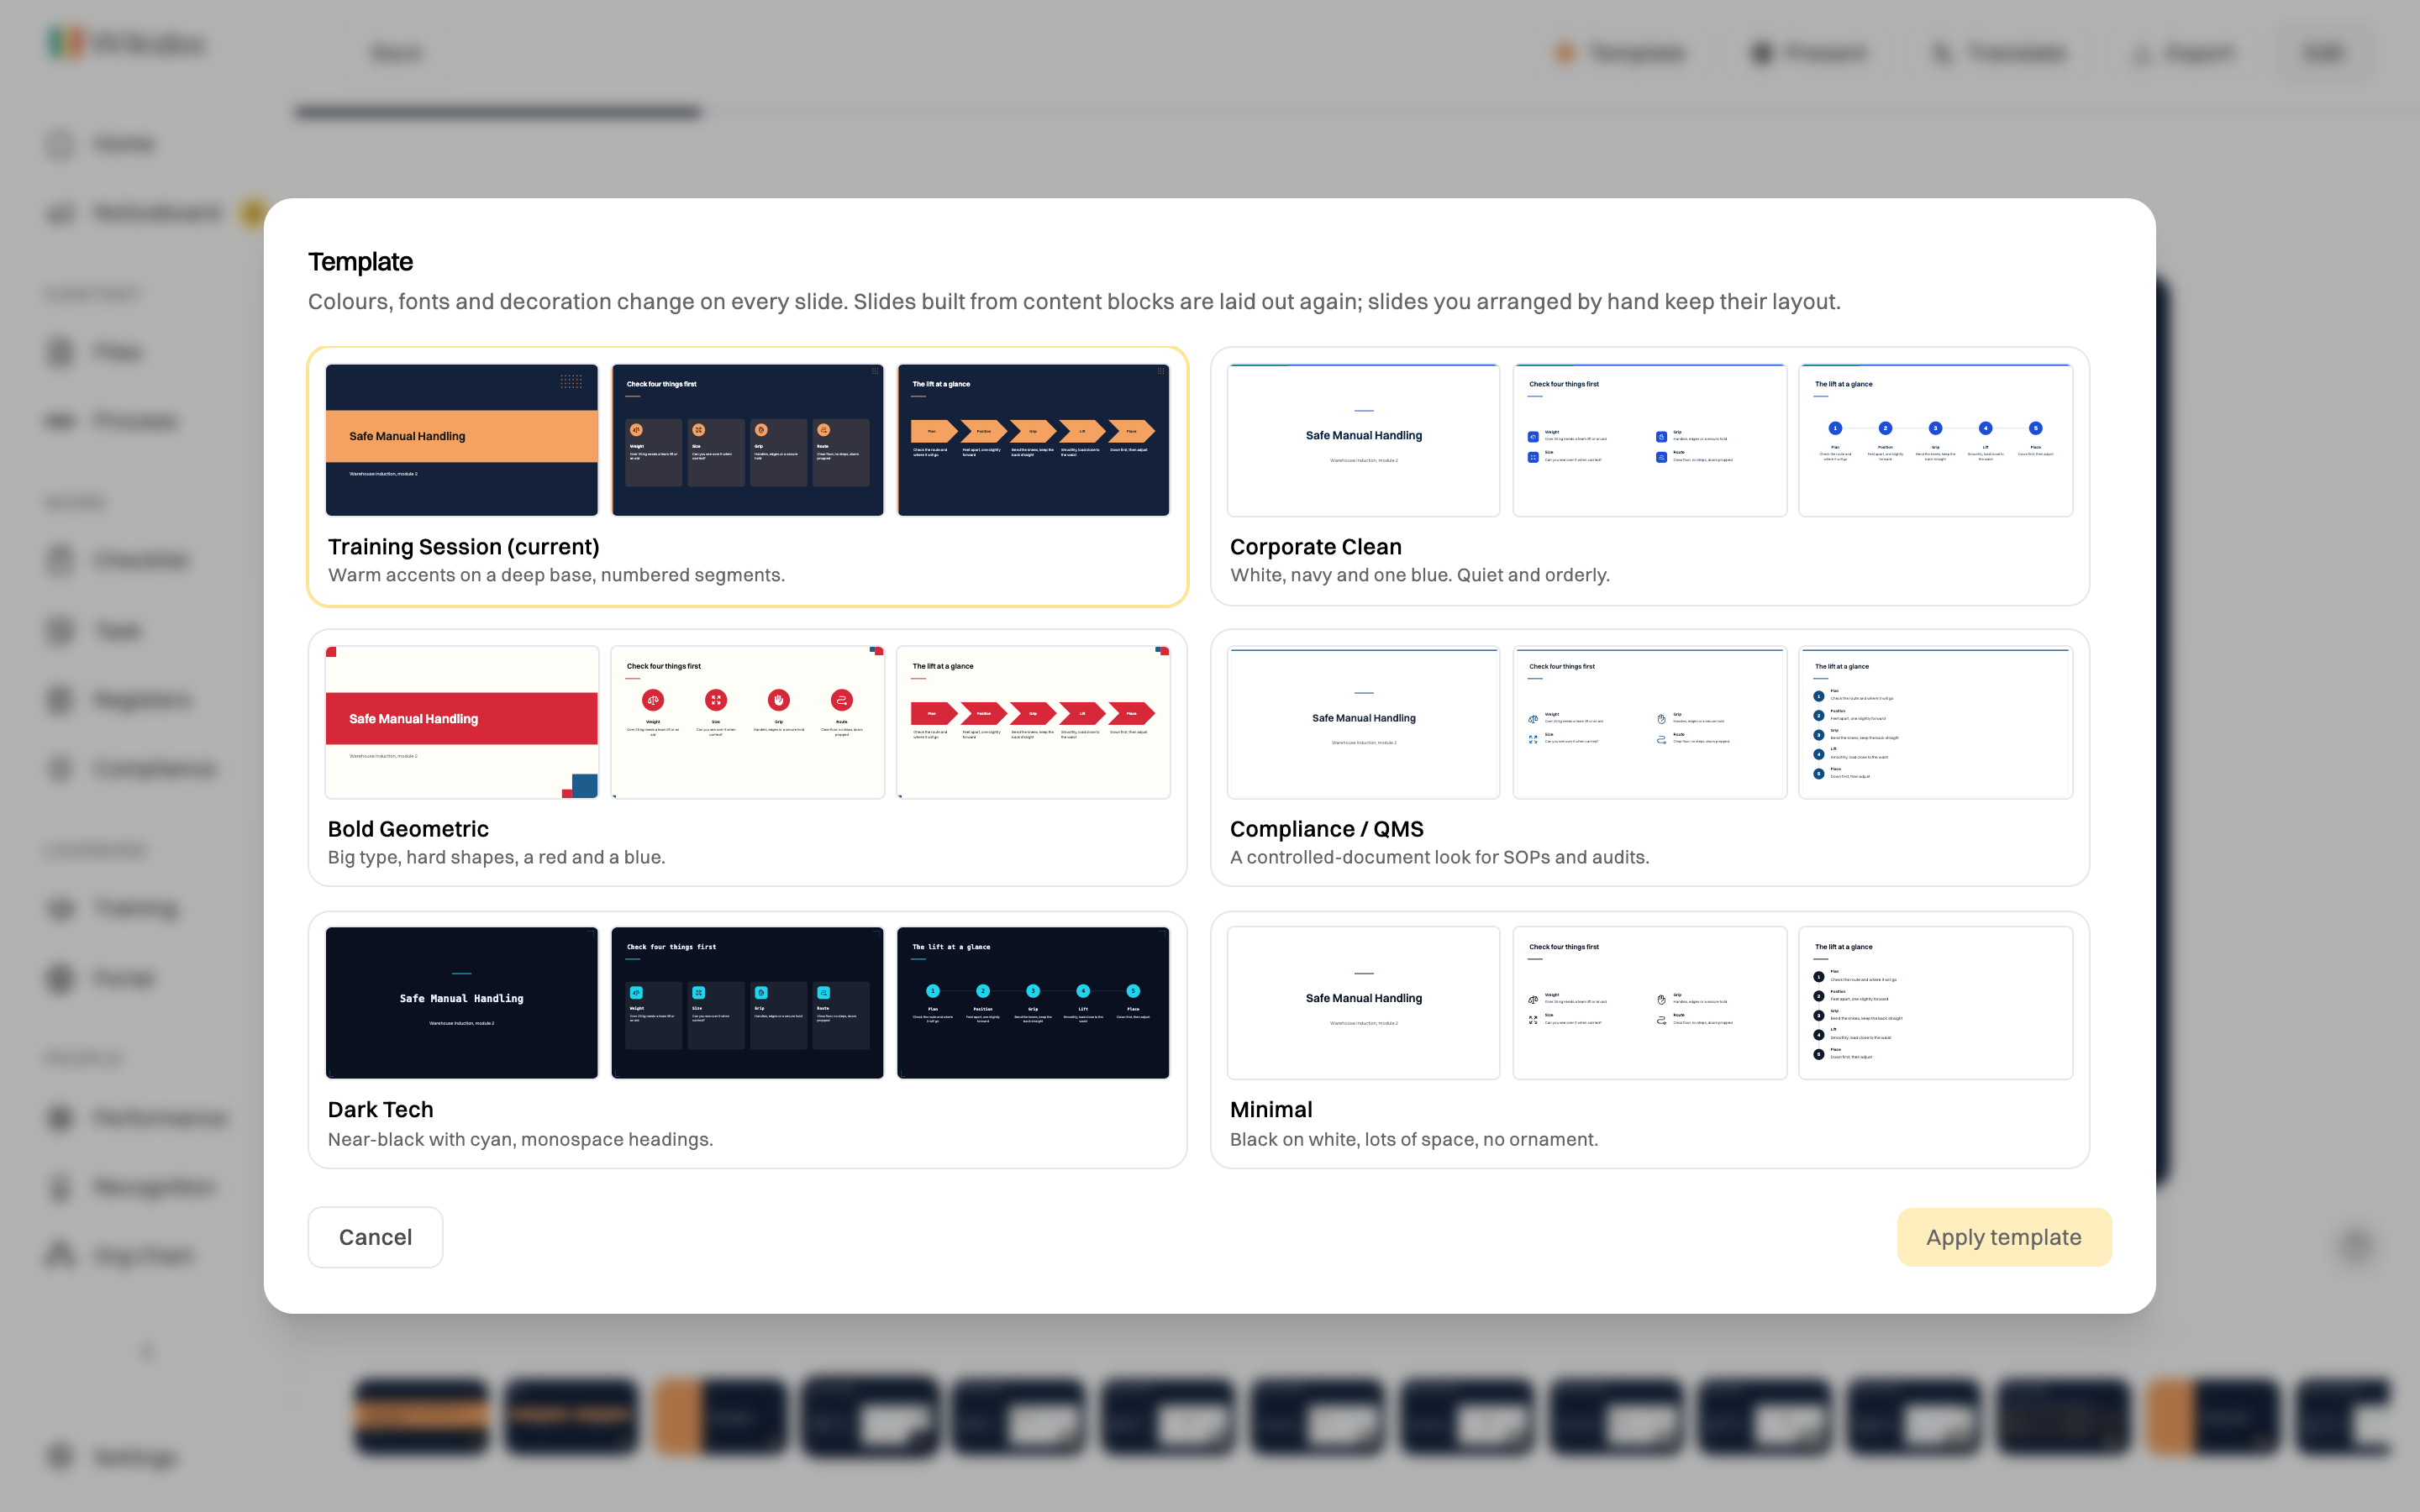
A new template lays the slides out again, keeping your text. A slide you’ve rearranged by hand keeps its layout and takes only the new colours and fonts.
Admins can set the template and other defaults every new deck in the organisation starts with, from Slide defaults for new decks… at the bottom of the Template menu.
Edit the slides
Section titled “Edit the slides”-
Click Edit.
-
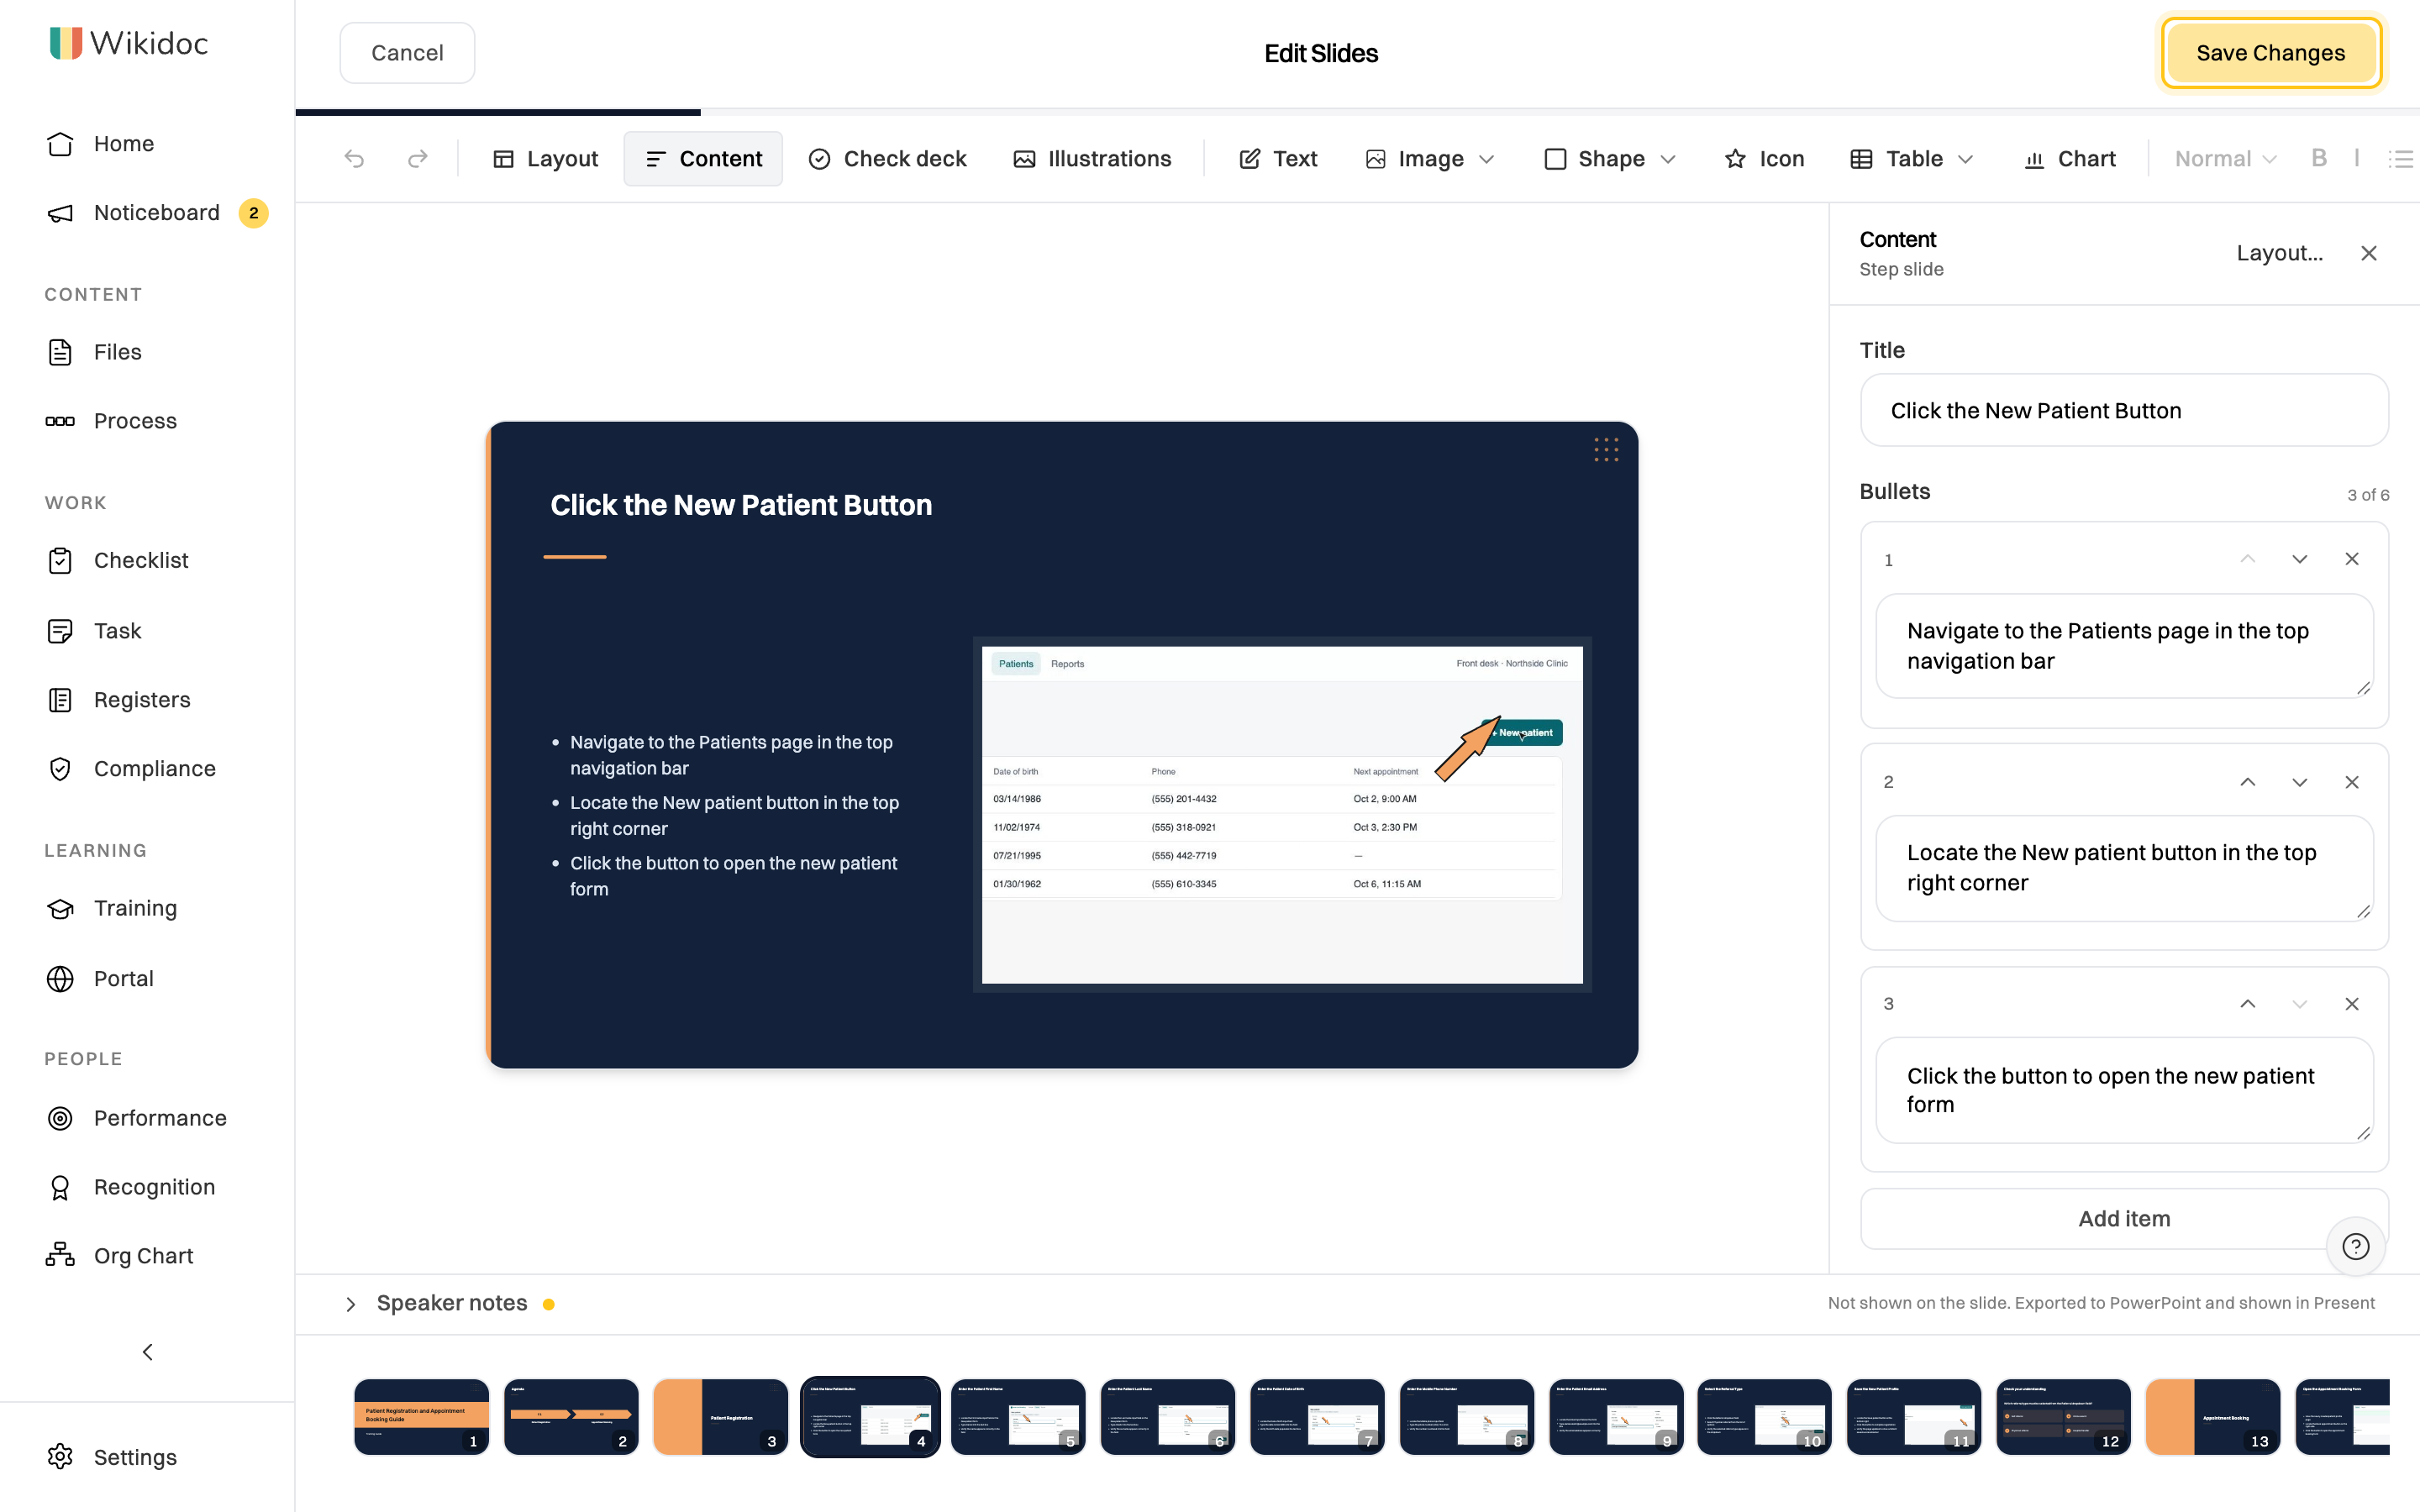
Click any text on a slide to change it, or click Content to edit the slide’s text as a form, such as each step of a process or the answers to a question. The slide lays itself out again as you type.
-
To change how a slide is arranged, click Layout and pick another, such as numbered steps instead of bullet points. The text comes with it.
-
Add to a slide from the toolbar: Text, an Image, a Shape, an Icon, a Table or a Chart. To add your own picture, you can also paste it or drop it on the slide. For a screenshot, you can Crop, Highlight or Blur part of it, give it Alt text for screen readers, or Replace it.
-
Write what the presenter should say under Speaker notes.
-
To add a slide, use the button at the end of the thumbnails and pick its layout. Each thumbnail has buttons to duplicate or delete its slide.
-
Click Save Changes, or Cancel to throw away your changes.
While you edit:
- Undo and Redo, or Ctrl+Z (⌘+Z on a Mac) and Shift+Ctrl+Z, step back and forward through your changes.
- Select several things and click Group to move them together. Ctrl+C and Ctrl+V (⌘ on a Mac) copy them to another slide.
- Check deck looks for text that doesn’t fit, colours that are hard to read, and the same layout used too many times in a row. Click Go to slide beside a problem to fix it.
- On Pro and Team, Illustrations draws AI pictures for the cover, section and scenario slides, in the template’s style. A slide that shows a step keeps its real screenshot. They come from the same monthly allowance as scenario video pictures.
Export the slides
Section titled “Export the slides”Click Export:
- PowerPoint (.pptx): opens in PowerPoint or Keynote, with the text, screenshots, speaker notes and alt text. Tables and charts stay editable, and the template’s background and footer are on the slide master.
- PDF: the slides with real, searchable text. Choose Notes pages or Handout, 3 per page to print them with notes or as a handout.
- Download as PNG (ZIP): each slide as an image.
The quiz
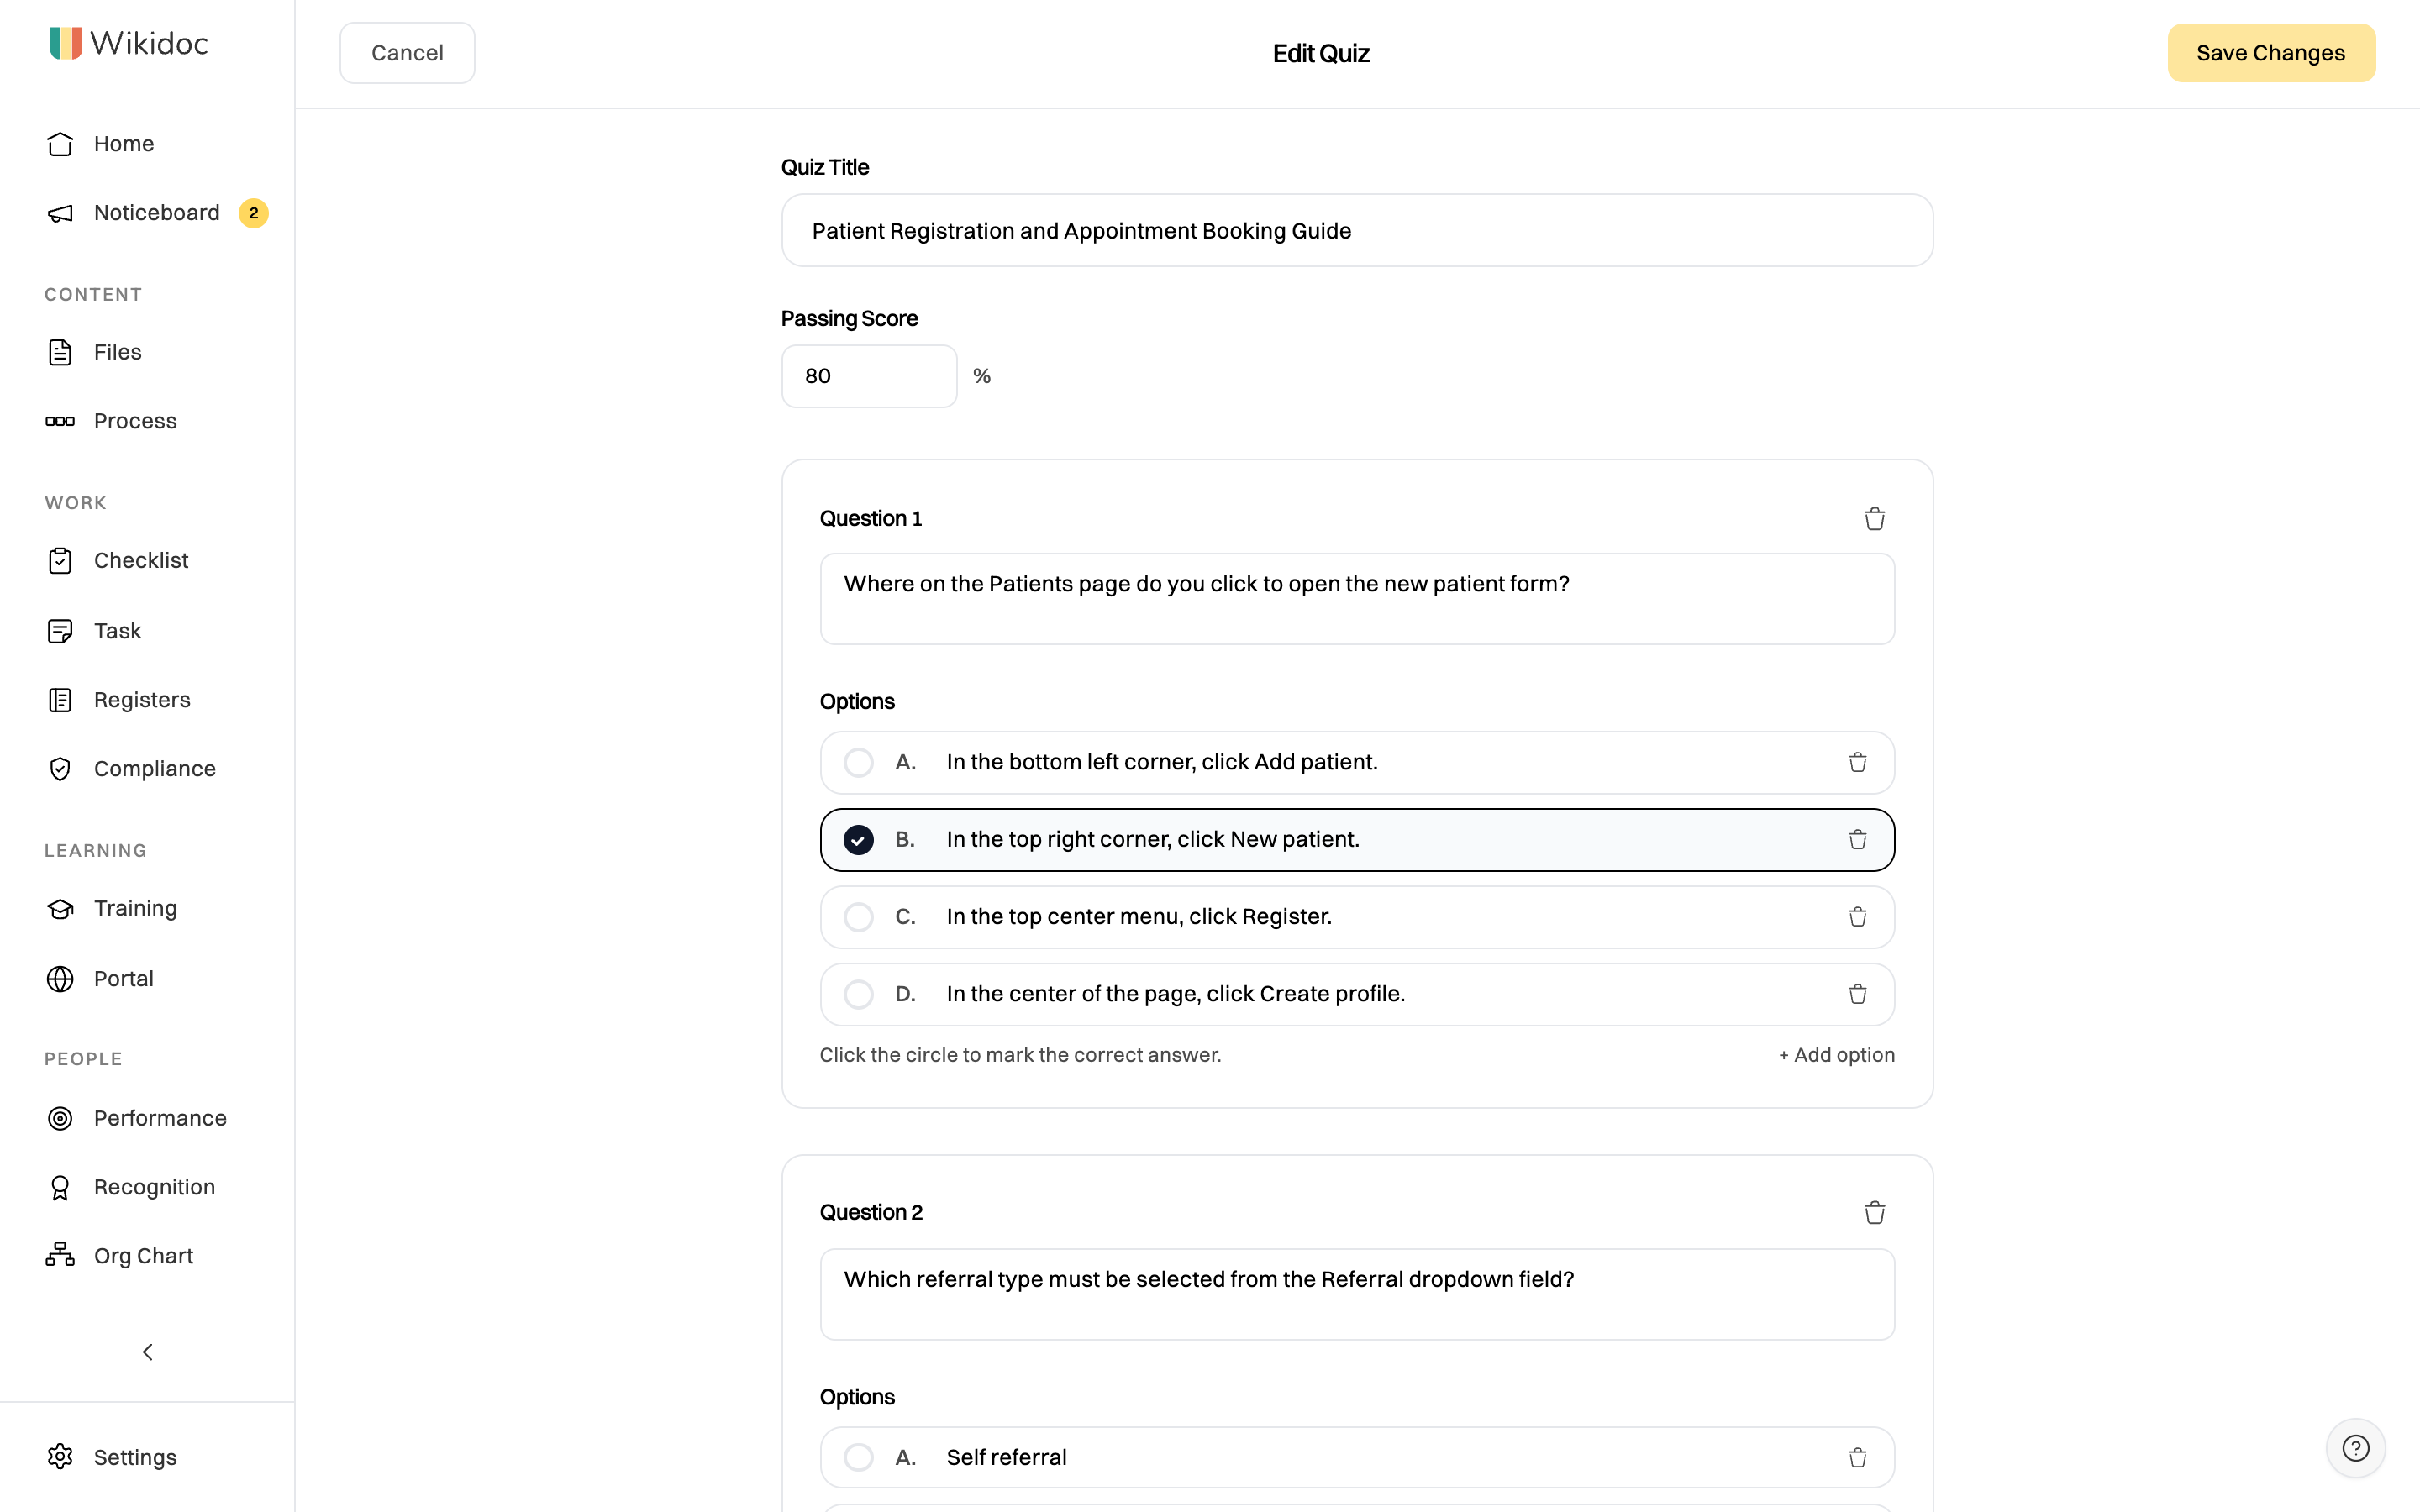
Section titled “The quiz”On the Quiz tab, click Edit to take it the way a learner would, one question at a time.
To change it, click Edit:
- Change the Quiz Title and the Passing Score.
- Change a question or its answers. Click the circle next to an answer to make it the correct one.
- + Add option adds an answer to a question, and + Add Question adds a question. The bin icons delete them.
Click Save Changes when you’re done.
On the Pro and Team plans, Export downloads the quiz as QTI, which most learning management systems import, or GIFT, for Moodle.
Use them in training
Section titled “Use them in training”To assign the slides and quiz to people and see who passes, turn the document into a training module. See Build a training module.