
Create a document from files or a recording
Add your policies, procedures, spreadsheets, audio or a screen recording, and Wikidoc writes the SOP, slides, quiz and narrated video from them.
Give Wikidoc the material you already have, such as a Word policy, a PDF procedure, an Excel checklist, a recording of a toolbox talk or a screen recording of a task. Wikidoc reads it, plans an outline, and writes any of these from it:
- Document: a written SOP in the format you choose.
- Slides: a training deck with speaker notes.
- Quiz: multiple-choice questions covering every learning objective.
- Narrated video: a training video with an AI voiceover and captions. See Create and edit an AI-narrated video.
Everything is written from your files. Each point in the outline shows which file, and which part of it, it came from.
Create the document
Section titled “Create the document”-
On Home, click Documentation. Or click Files in the sidebar, then + New file.
To create the document in a team workspace, open the team under Teams in the sidebar first. See Organise files: folders and team workspaces.
-
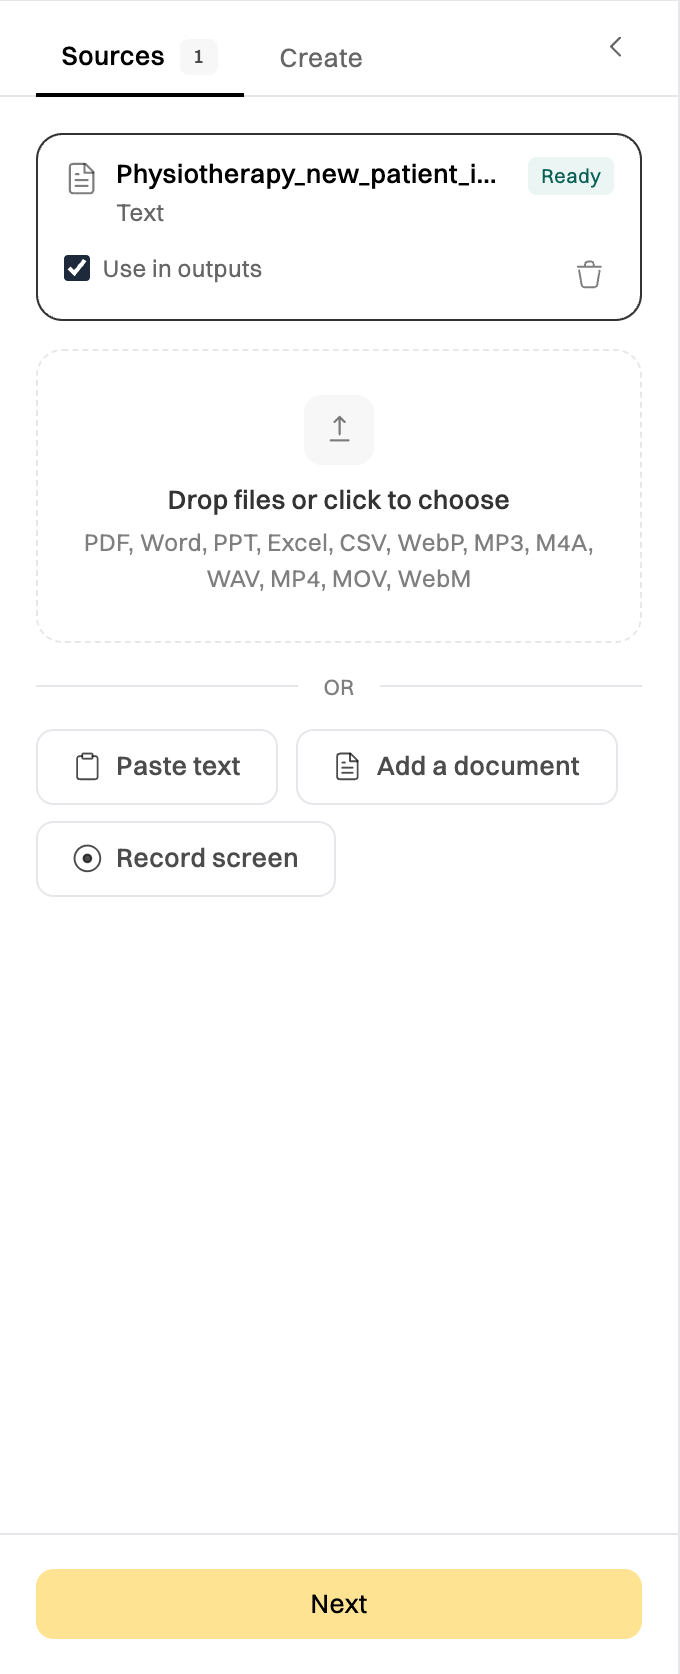
On the Sources tab, drop your files on Upload sources, or click it to choose them. To use text from an email or a web page, click Paste text. To use a document you made from a template, click Add a document (see below). To record a task now, click Record screen (see below).
Wikidoc reads each file as it’s added. Click a file to see what was read from it.
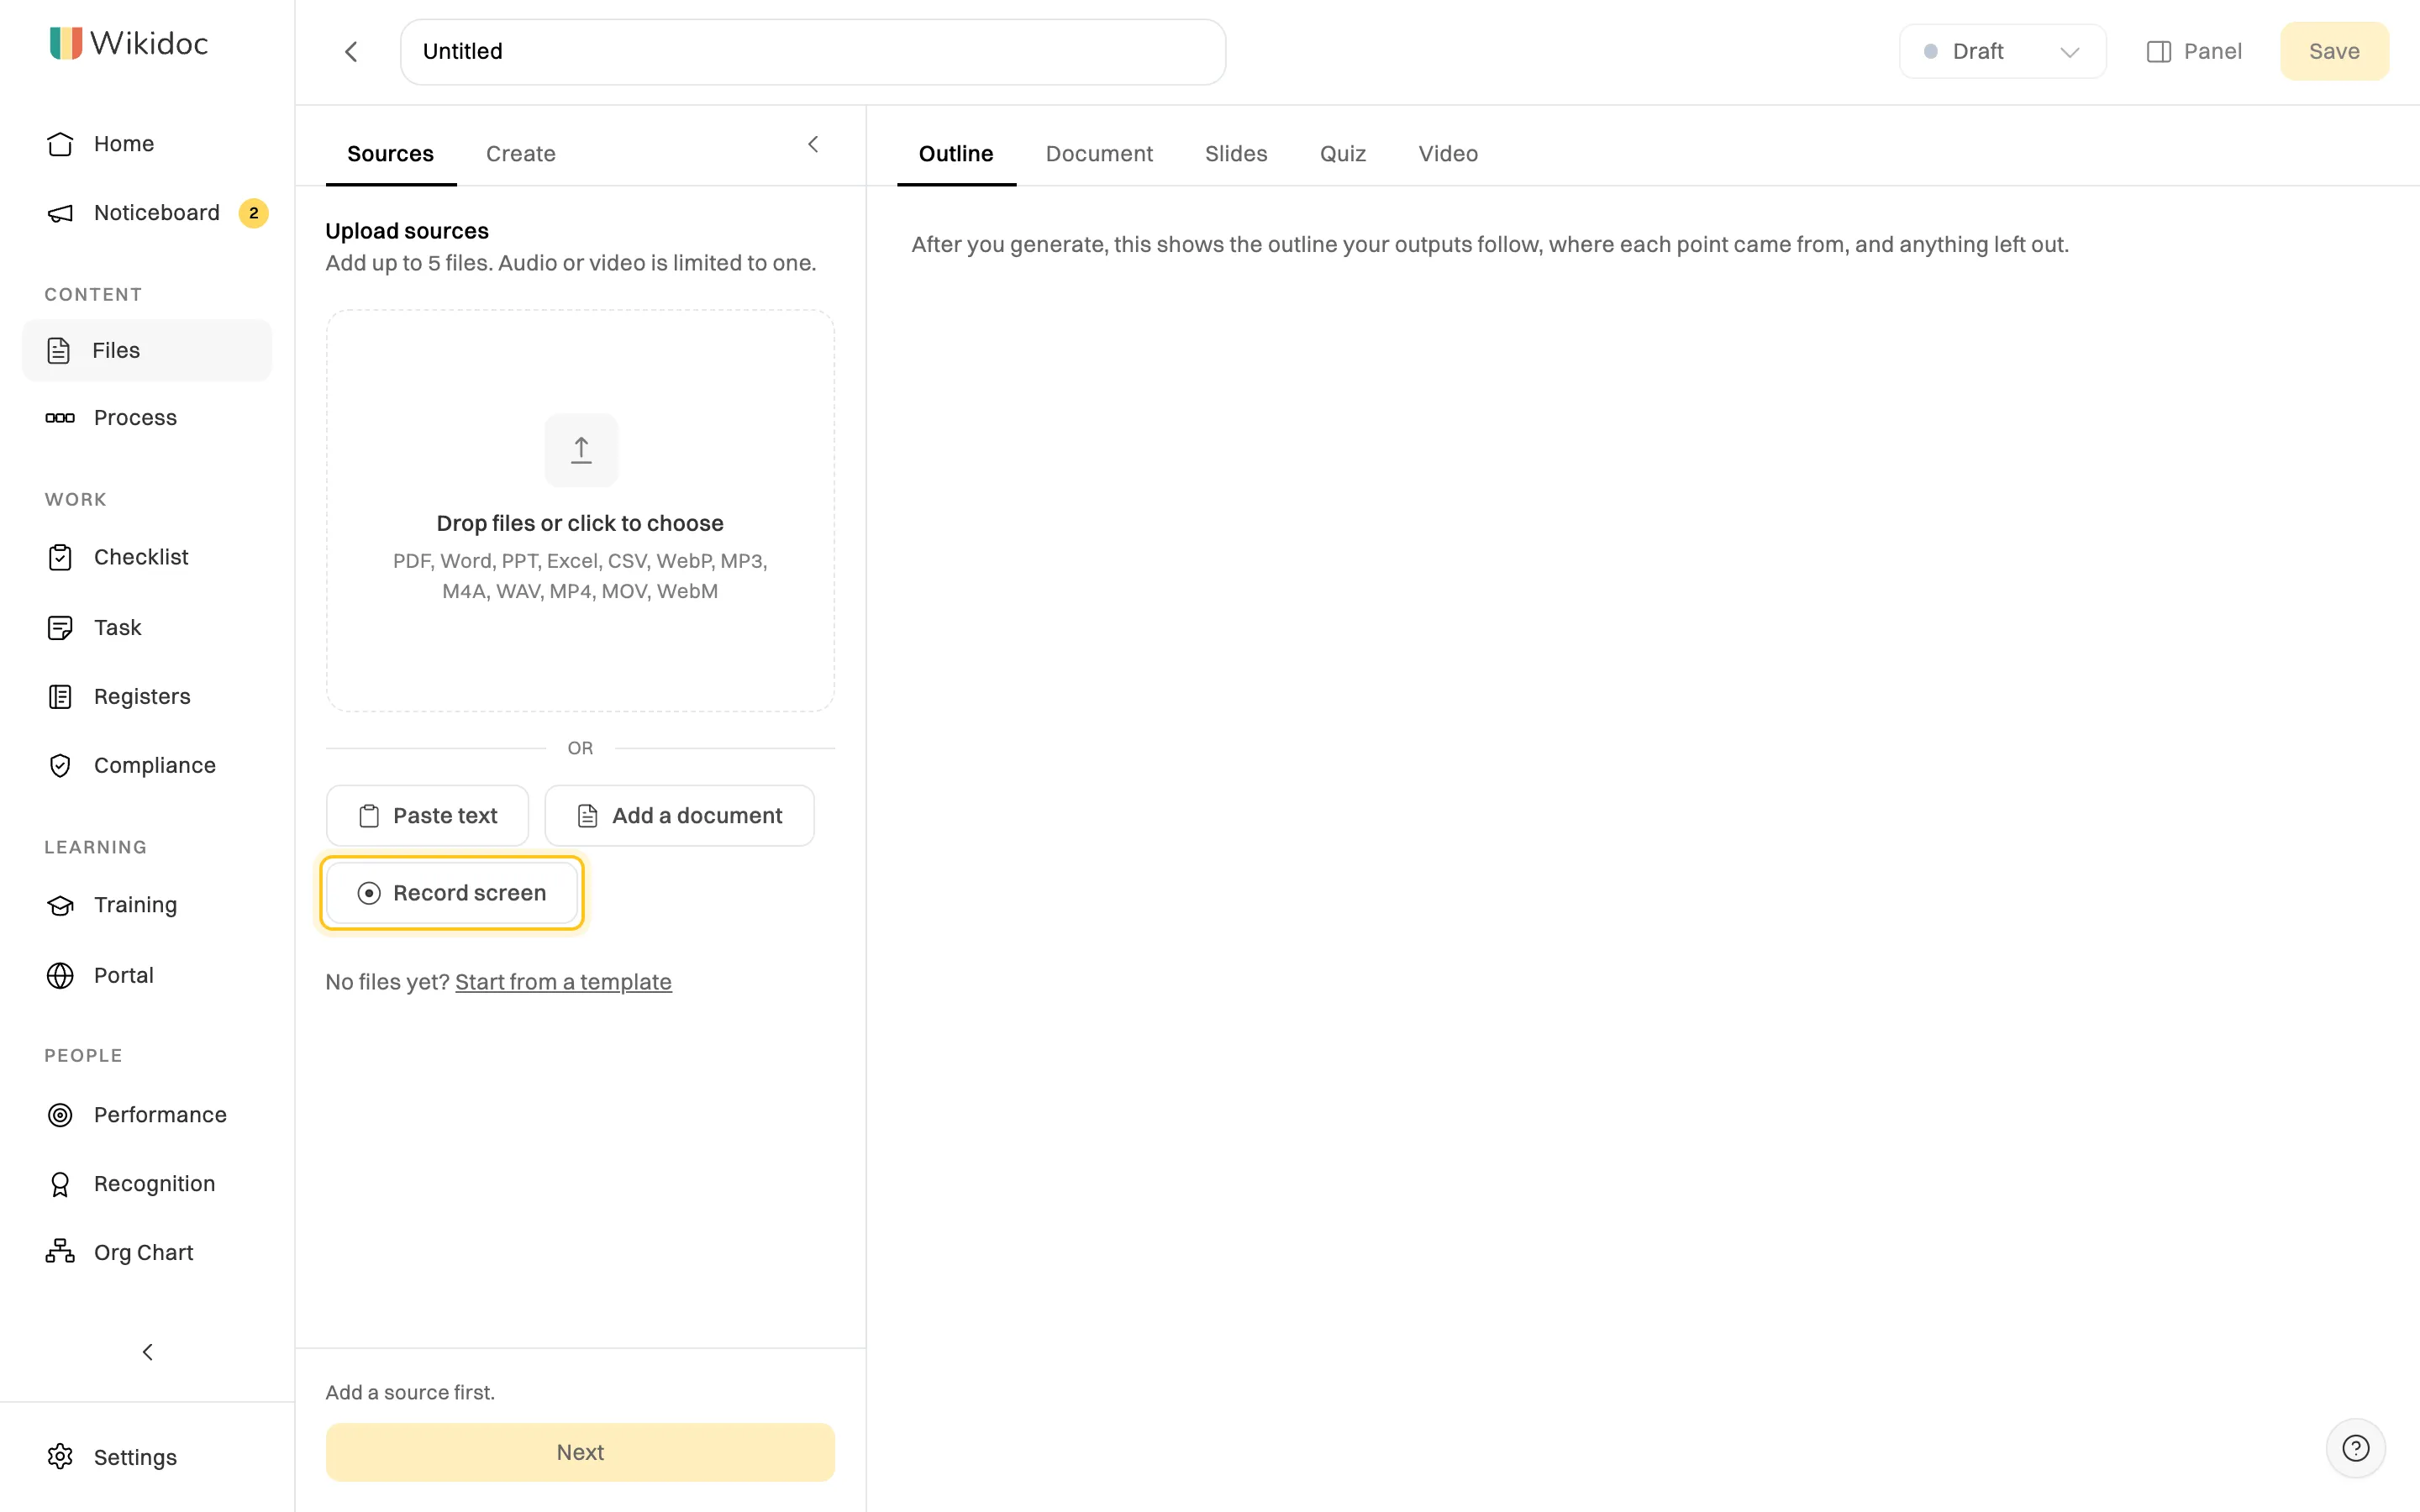
Drop files, paste text, add a document or record your screen. -
Click Next.
-
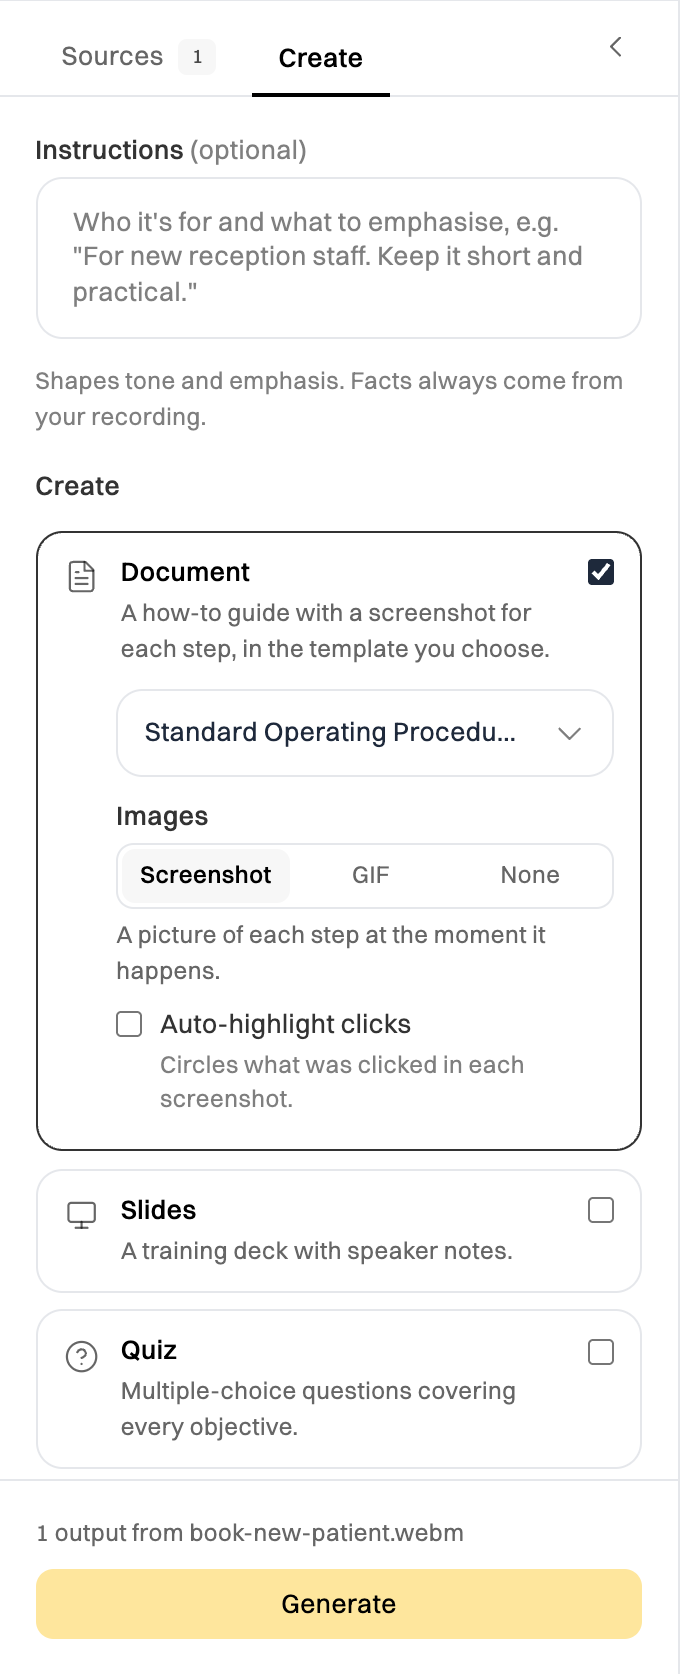
On the Create tab, tick what you want to make. Each output has its own options:
- Document: choose a format, such as Standard Operating Procedure (SOP) or Quick Reference Guide. Under My formats you can save your own.
- Narrated video: choose a style, a voice, a language and a length.
-
Optionally, add Instructions, for example “For new warehouse staff. Keep it short.” Instructions change the tone and emphasis. The facts always come from your files.
-
Click Generate.
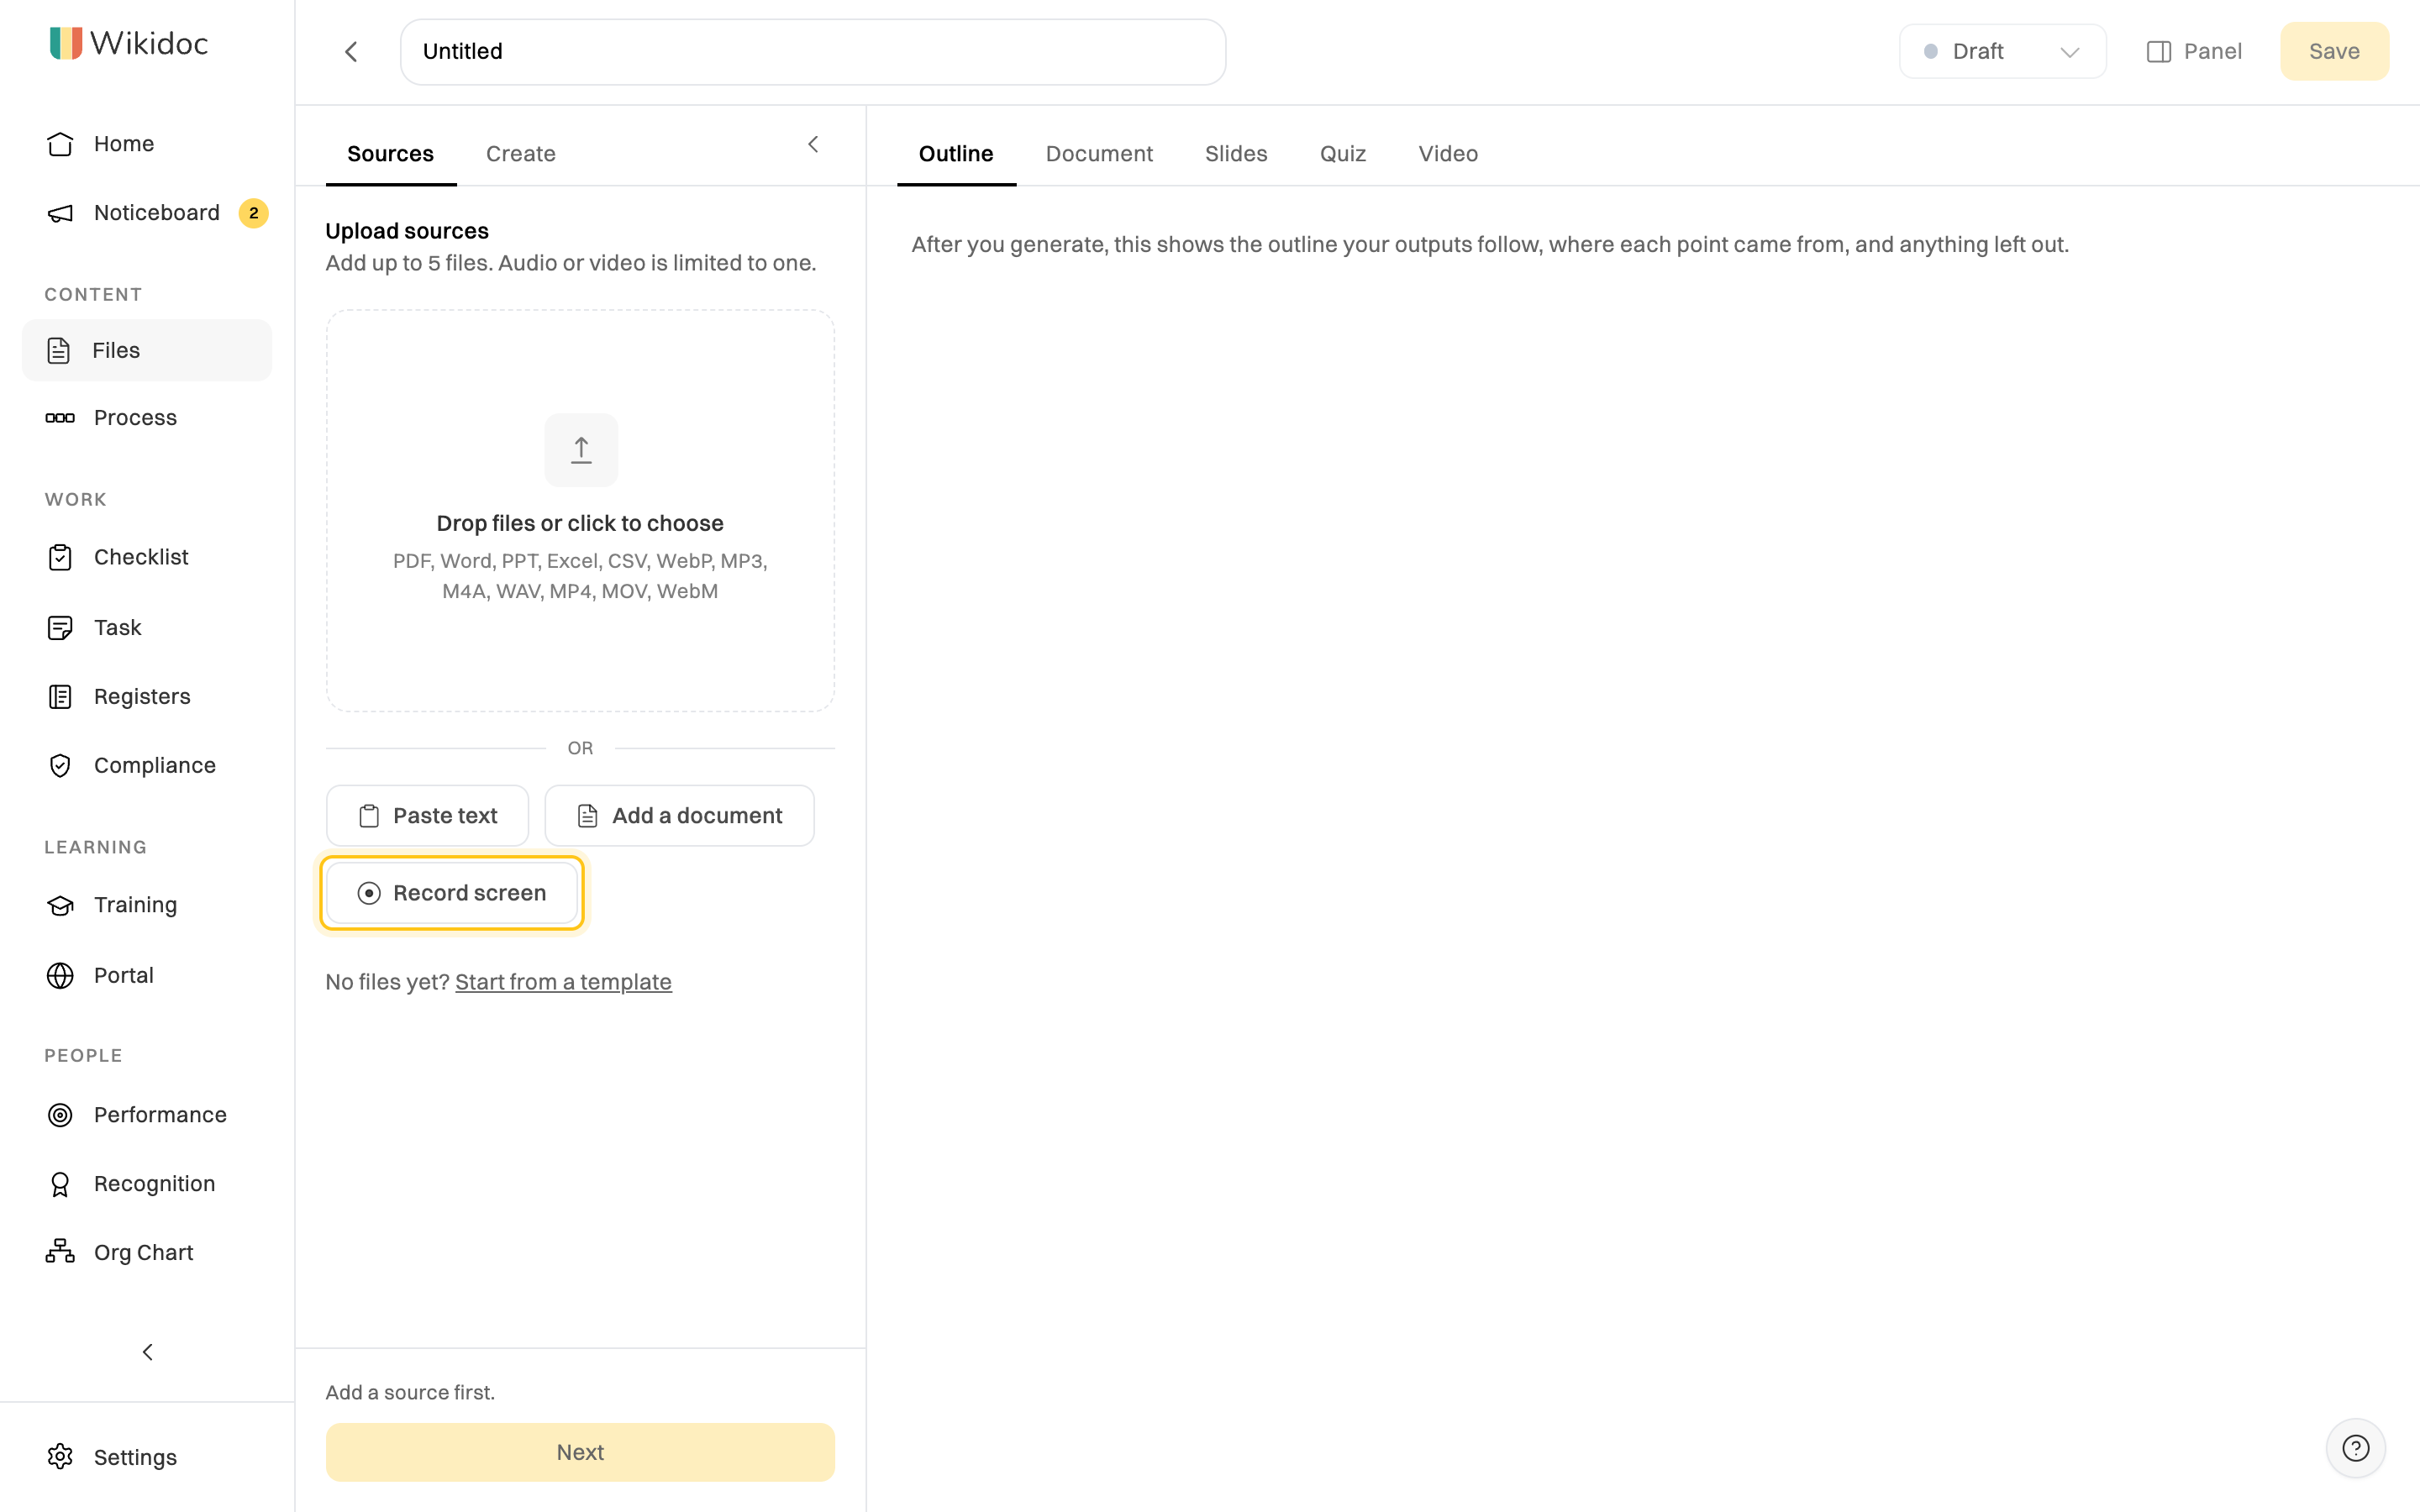
Wikidoc plans from your sources first, then writes each output. A short policy takes a minute or two, and a video several minutes. Stay on the page until it finishes: if you leave while it’s running, what isn’t made yet stops.
The document is saved as a Draft in your workspace.
What you can add
Section titled “What you can add”| File | Notes |
|---|---|
| PDF, Word, PowerPoint | Headings, lists, tables and images are kept. A scanned PDF is read as images. |
| Excel and CSV | Each sheet is read as a table. |
| Images (WebP) | Text and diagrams in the picture are read. |
| Audio (MP3, M4A, WAV) | Transcribed, then split into sections. |
| Video (MP4, MOV, WebM) | A talk, lecture or demonstration is transcribed. A screen recording of a task is handled differently: see below. |
| Pasted text | Up to 200,000 characters. |
| A document made from a template | Its text is added, like pasted text. Images aren’t included. |
| Limit | Free | Pro and Team |
|---|---|---|
| Files per document | 1 | 5 |
| Audio and video files | 10 minutes, 250 MB | 30 minutes, 2 GB |
| Screen recordings | 5 minutes | 15 minutes |
A document can have one audio or video file.
Documents made from a template
Section titled “Documents made from a template”A document you started from the template library, and then filled in, can be a source too. For example, fill in the new patient intake procedure, then make a training deck and quiz from it.
-
On the Sources tab, click Add a document. The list shows the documents you made from a template, newest first. Type in Search documents to find one by name.
-
Click the document, then click Add source. You can also double-click it.
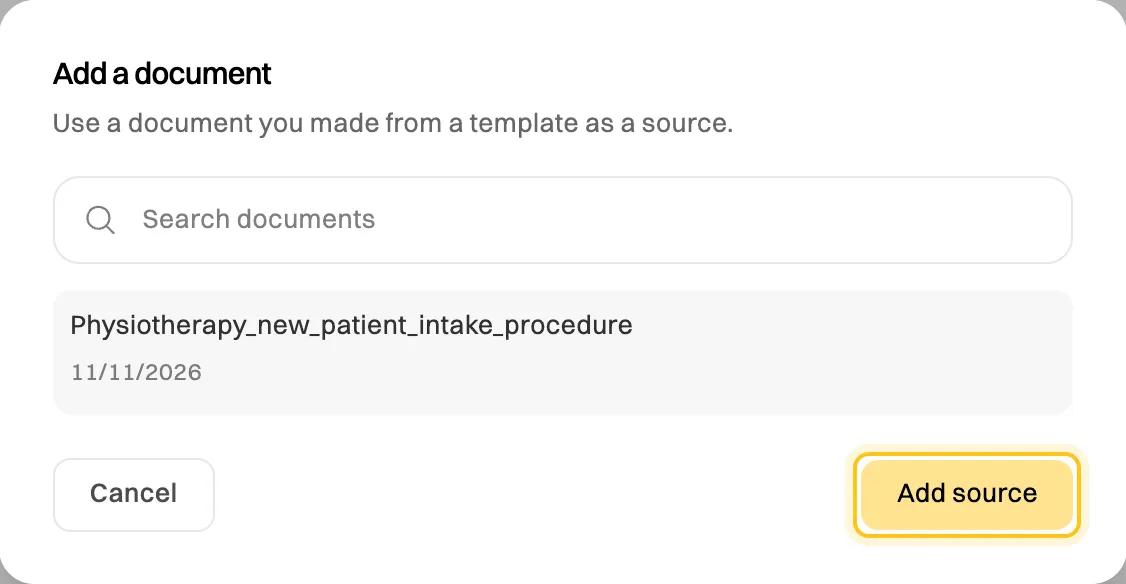
Pick a document you made from a template.
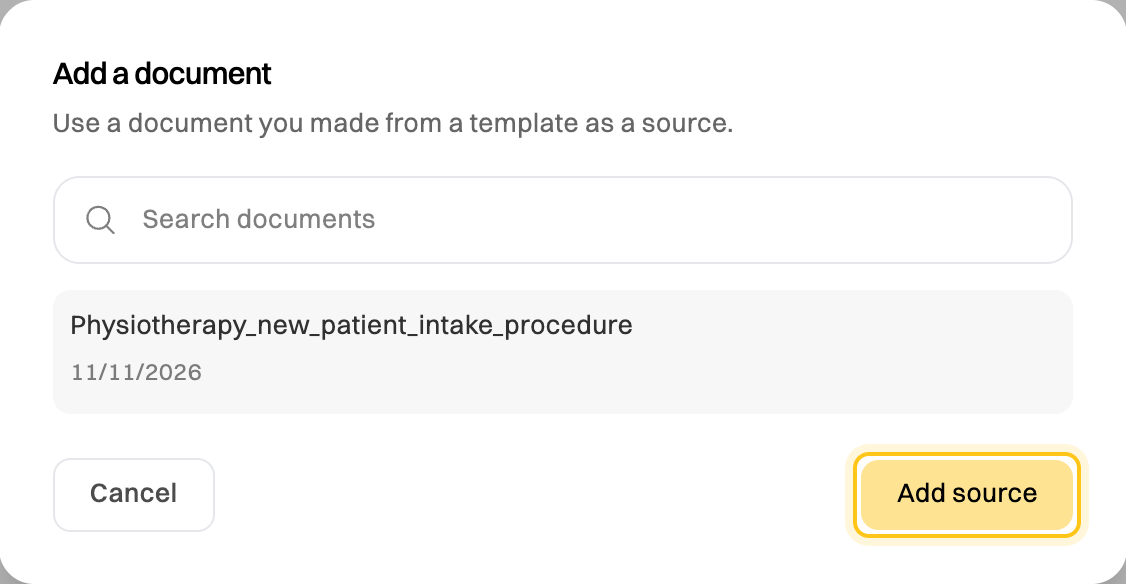
Its text is added as a source, with its headings as sections. It counts as one of the document’s files, like pasted text. Images in the document aren’t included.
Later changes to the template document don’t change the source. To use a newer version, remove the source and add the document again.
Screen recordings
Section titled “Screen recordings”When you add a screen recording of a task, Wikidoc recognises it and makes everything step by step from it: an instruction and a screenshot for each step, and a narrated walkthrough of the recording itself. Any other files you add beside it, such as the policy that governs the task, are used as reference for the written document.
If Wikidoc finds no on-screen steps in the video, it reads the video as a normal file instead and tells you. To do that yourself, click Read as a normal file on the video.
To record in Wikidoc, click Record screen. Your browser asks to use your microphone, then which screen, window or tab to share. Do the task, then click Stop. You can Pause and Resume along the way. Talk through what you’re doing if it helps: Wikidoc listens to your narration as well as watching what you click.
For a document made from a screen recording, the Document option on the Create tab also has Images:
- Screenshot: a picture of each step. Tick Auto-highlight clicks (Pro and Team) to circle what was clicked in each screenshot. On any plan you can add highlights yourself afterwards with Highlight.
- GIF: a short animation of each step (Pro and Team). See Add GIFs to a document.
- None: text only.
Checks before Generate
Section titled “Checks before Generate”- “This file seems unrelated to your other files.” Untick a file on the Sources tab if it shouldn’t be used. Unticked files stay in the document but aren’t read.
- “Your sources disagree on some points.” Wikidoc lists where your files contradict each other. Fix the files, or click Create anyway.
- “Your files are close to the content limit.” Untick a file or split a long one.
Review what was made
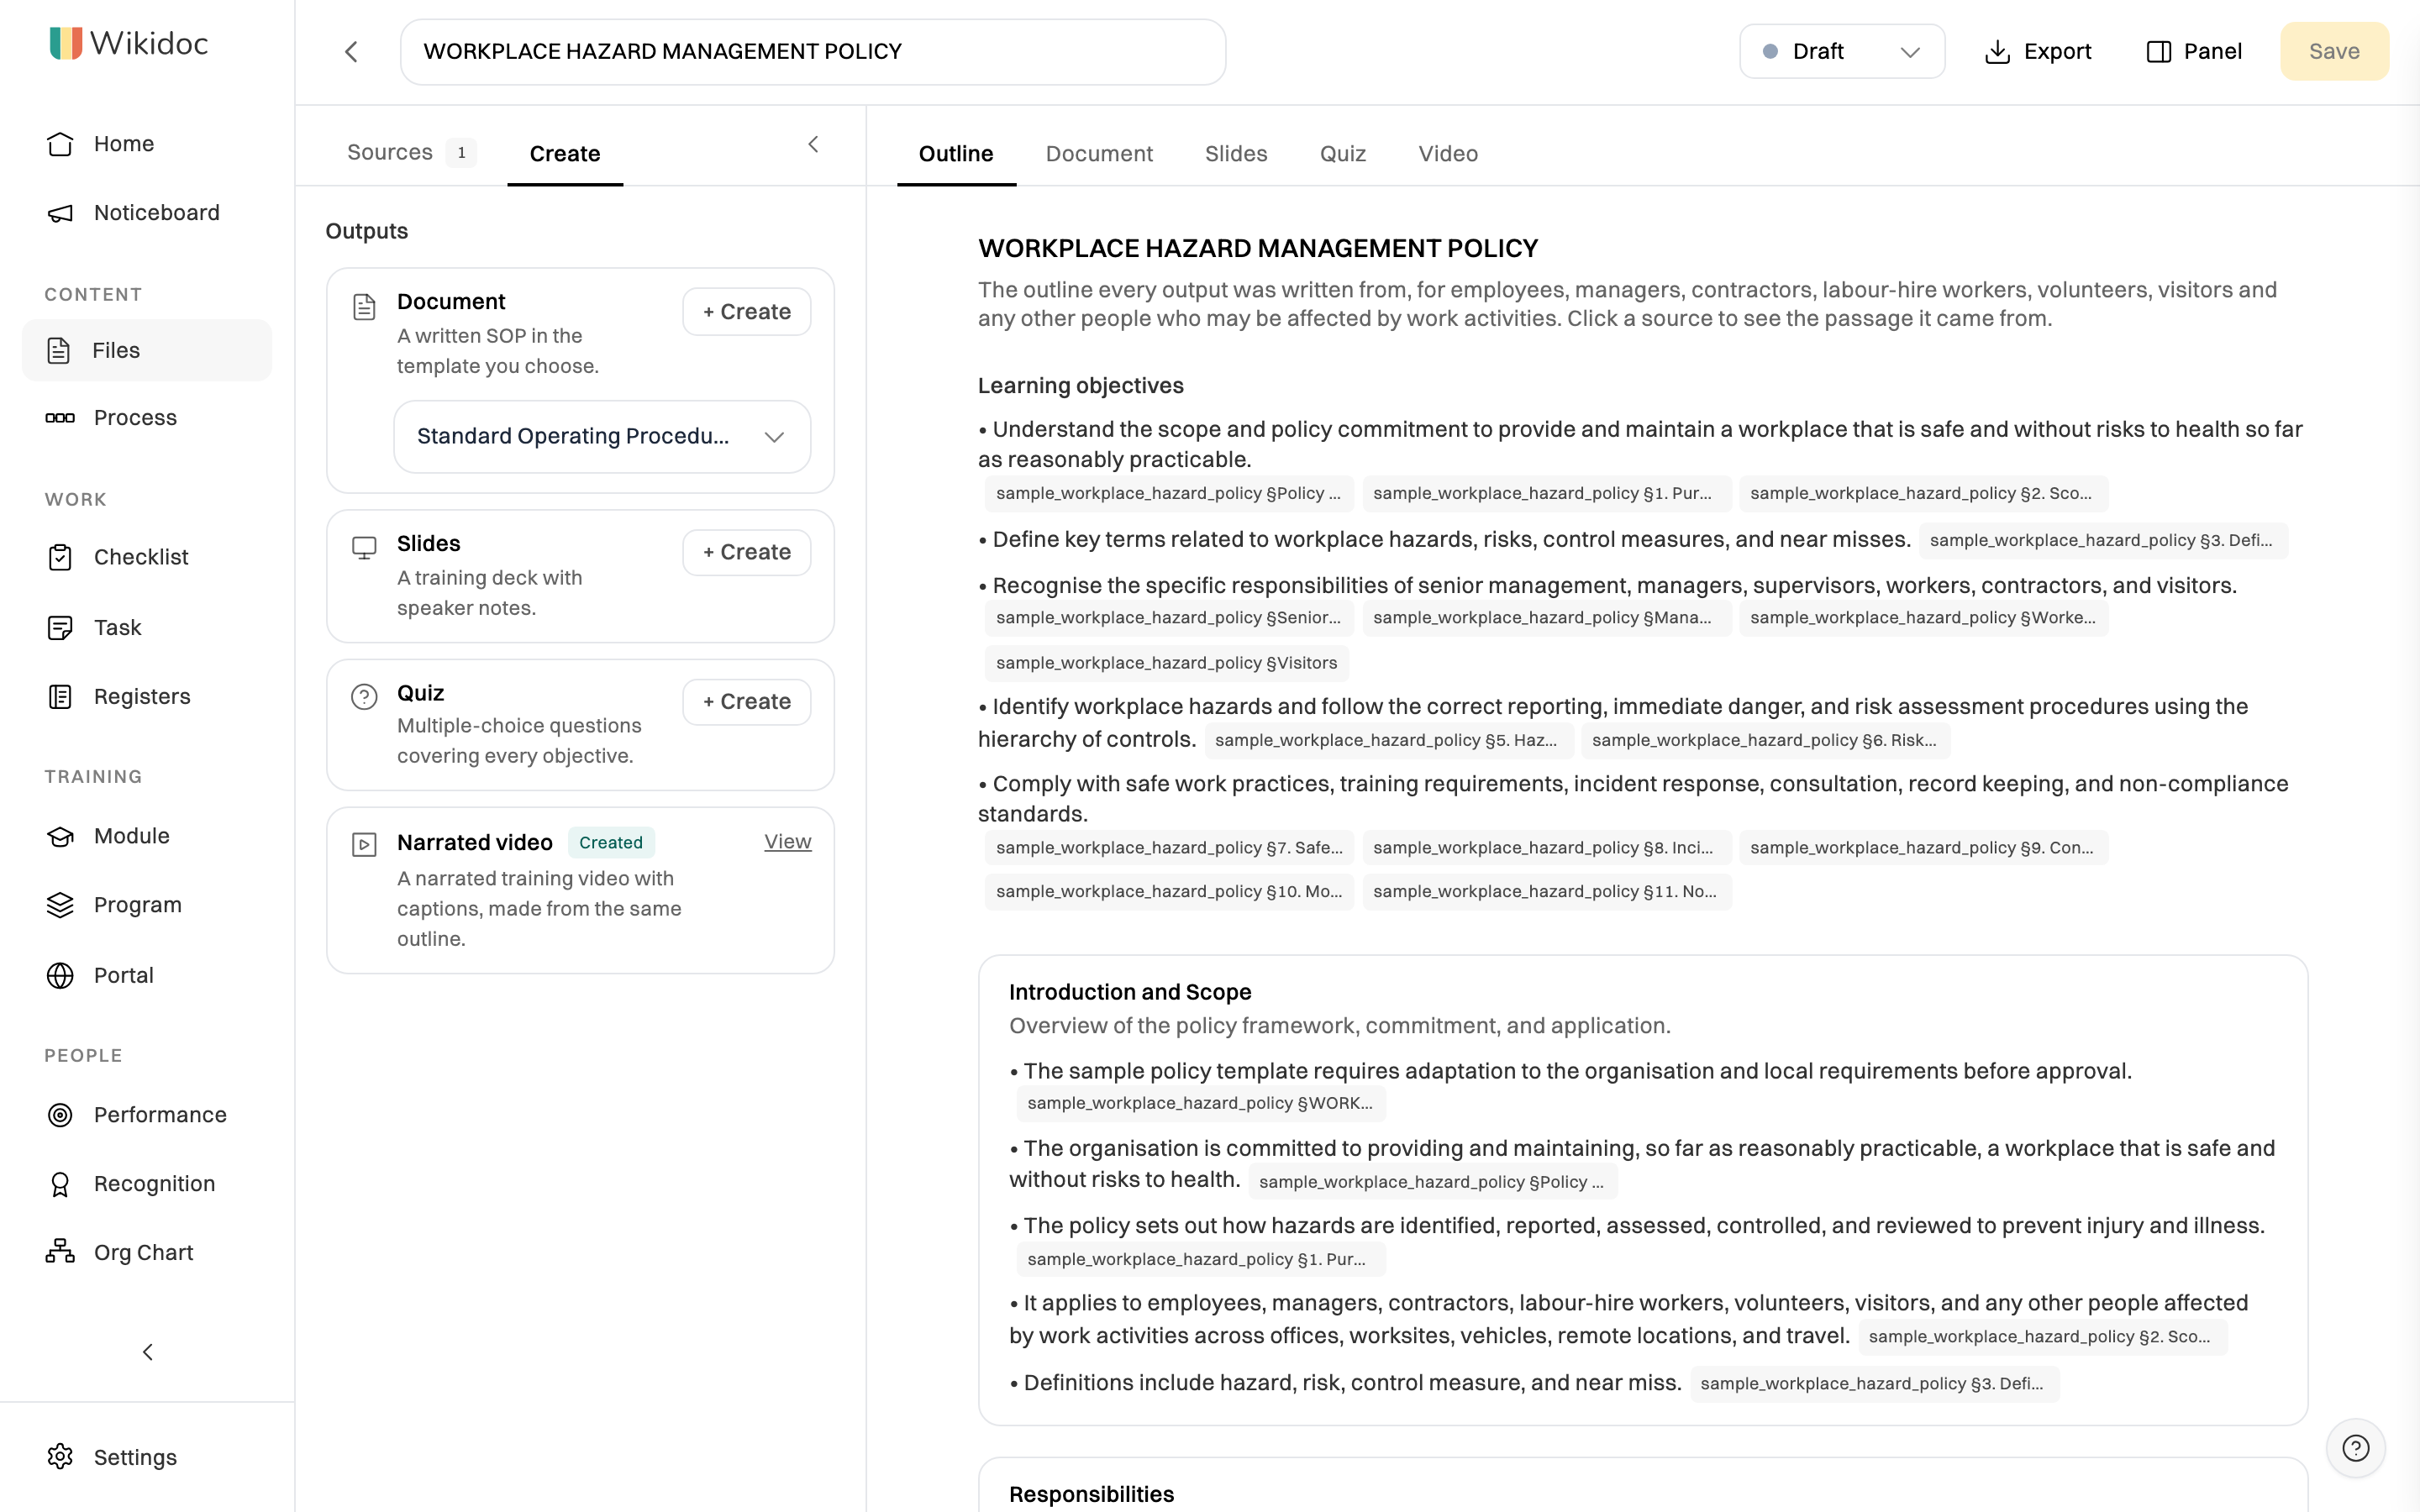
Section titled “Review what was made”After Generate, the right side shows each output on its own tab: Outline, Document, Slides, Quiz and Video.
- Outline lists the learning objectives and the points every output was written from. Click a source chip to see the passage it came from. Not used lists parts of your files the outline doesn’t cite, so you can check nothing important was left out. Not in the sources marks anything Wikidoc noted as missing from your files.
-
To change an output, open its tab and click Edit. Content is edited in the outputs themselves, not in the outline.
-
To make an output you didn’t tick, click + Create beside it on the Create tab. It’s written from the same outline.
For a document made from a screen recording, the slides, quiz and video are made from the saved document instead, so they take a minute or two. If you didn’t make the document, Wikidoc analyses the recording again first, which takes about as long as the first Generate. Keep the tab open until it’s done. The same happens for slides when the document’s images are GIFs or None.
Get a better document
Section titled “Get a better document”- Give it the real policy. Wikidoc doesn’t add rules that aren’t in your files. If something is missing, add the file that covers it.
- One topic per document. “Manual handling” makes a better module than “all of WHS”.
- Check names and numbers. Review the outputs before you share them, as you would anything written for you.
- Remove what shouldn’t be shared. Wikidoc removes passwords, API keys and access tokens from the text it writes, but screenshots show exactly what was on screen. Blur anything private before you share the document.
Plan limits
Section titled “Plan limits”On the Free plan you can create three documents, three narrated videos, three slide decks and three quizzes. Pro and Team have no limit on any of them, and include monthly video minutes. See Plans compared.
When you’ve made all three of one kind, its card on the Create tab is greyed out and says so, so you can still generate the others. Making it again in a document that already has it doesn’t count again, except for quizzes.
If something goes wrong
Section titled “If something goes wrong”A file is refused when you add it. The message says why, for example that it’s too long or too large for your plan. Shorten or split it, or save it in another format, and add it again. See Video upload rejected?
“Part of the transcript may be missing.” A long or silent recording didn’t transcribe completely. Check the source on the Sources tab, or split the recording into parts.
“Storage limit reached”. The file won’t fit in the storage you have left. Delete documents you no longer need from Files, then try again.
“Editor role or above required”. Viewers can read documents but can’t create them. Ask an Admin for the Editor role. See Roles and permissions.